Check, edit or turn off an integration
Each integration has its own page. Use it to see every alert we sent and whether it worked, change the integration’s settings, pause it, or delete it.
To open it, go to Settings → Integrations and click the integration’s row (or choose Edit in its ⋯ menu).
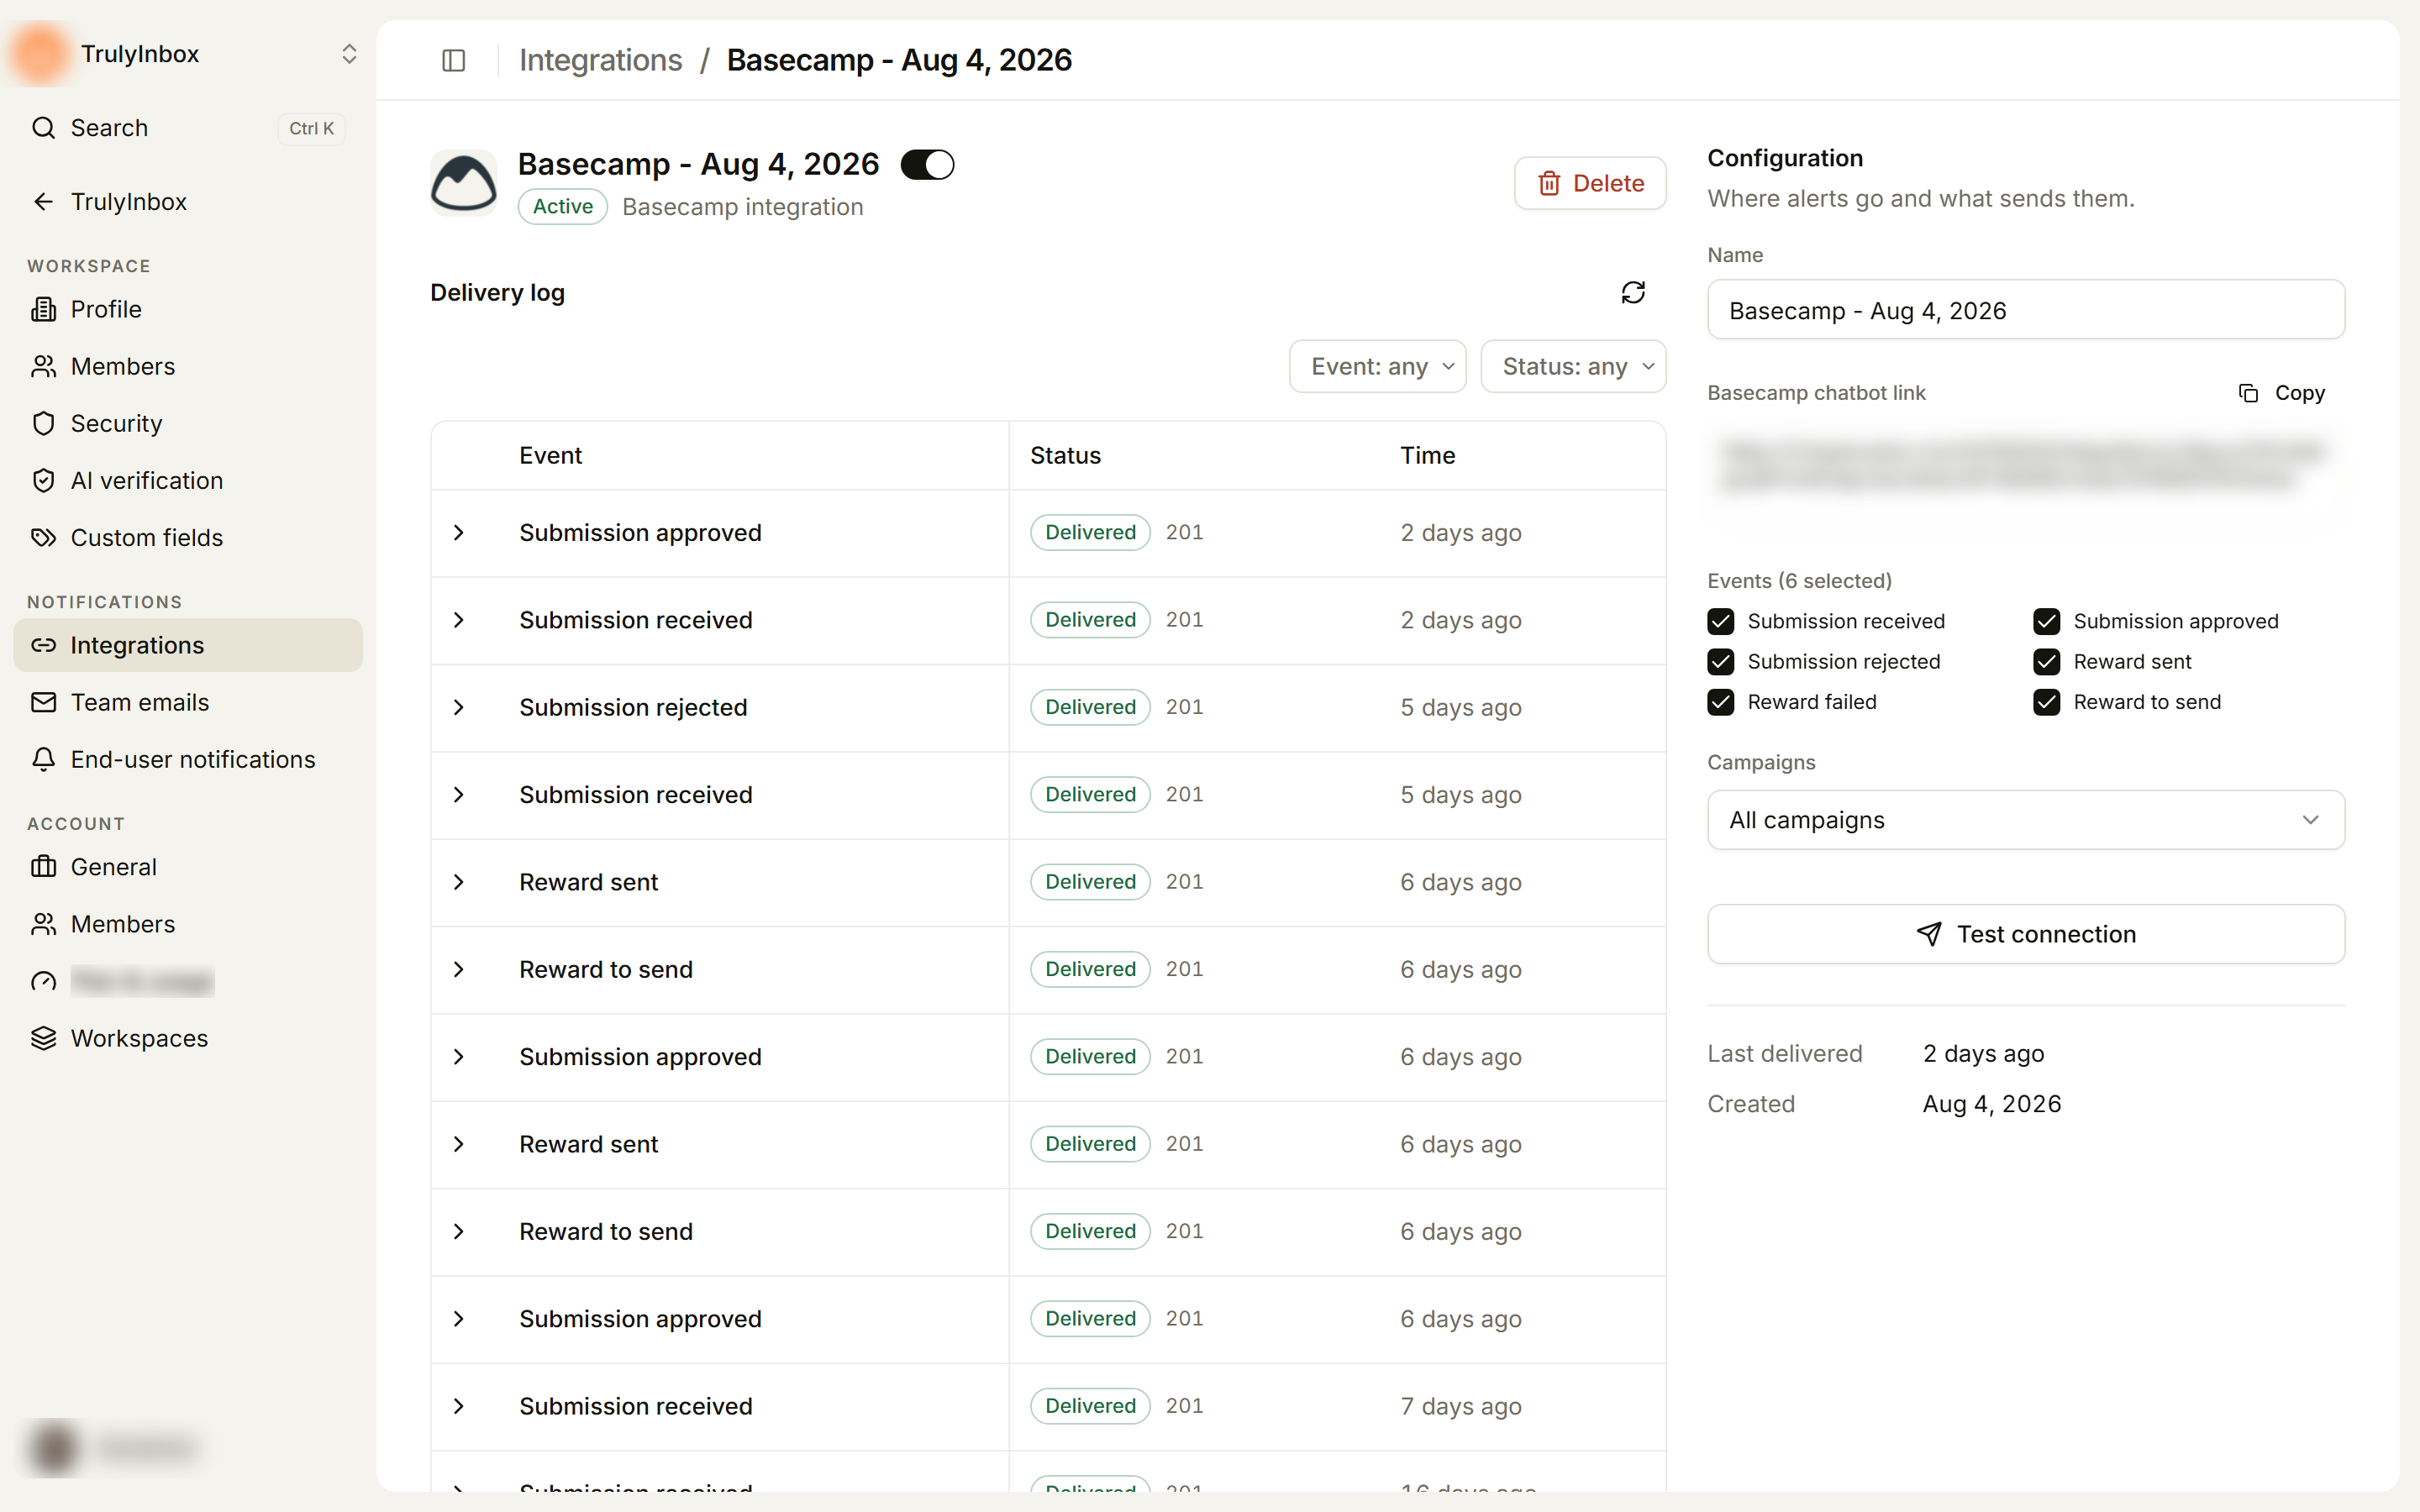
What’s on the page
- Header: the tool’s logo, the integration name, an on/off switch, the status (Active, Paused or Failed) with the tool name, and Delete.
- Delivery log: every real alert we sent to this integration.
- Configuration (right side): Name, the link with a Copy button, Events, Campaigns, and for your own server, Custom headers. Below these are Test connection, Last delivered and Created.
Read the delivery log
Each row shows the Event, the Status (Delivered or Failed, with the response code from your tool) and the Time.
- To narrow the list, use the Event and Status filters above it. Clear filters resets them.
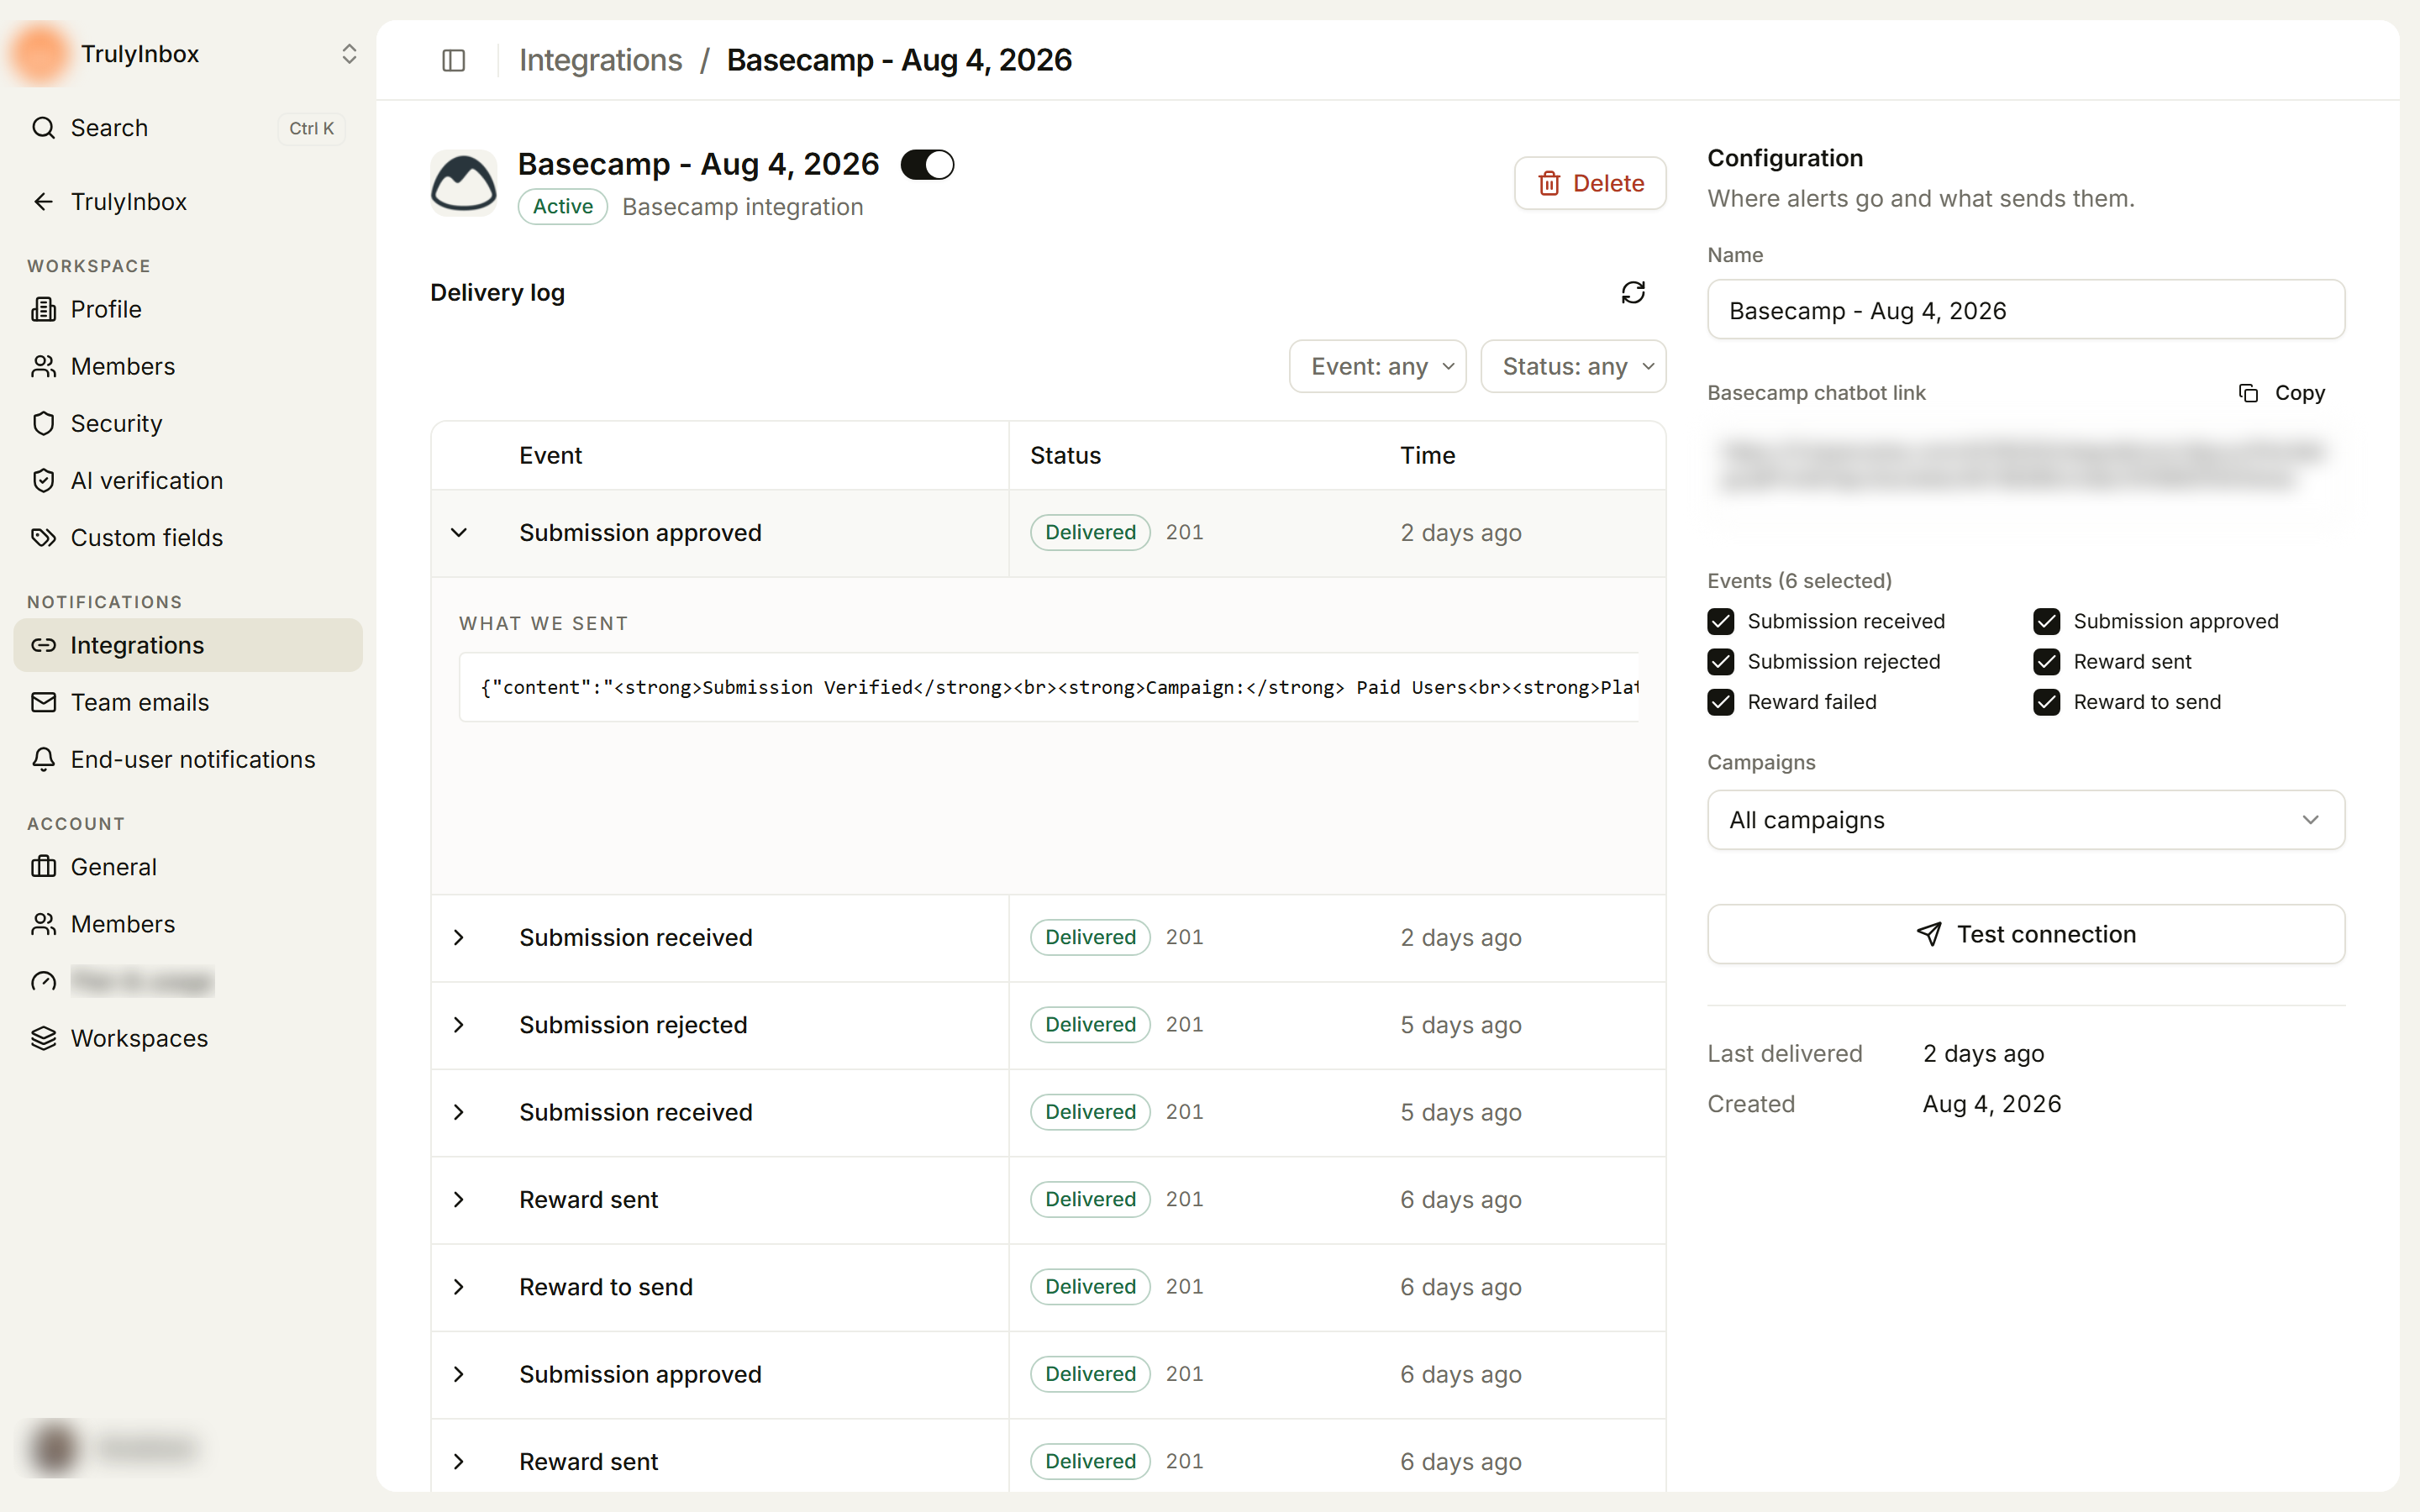
- Click a row to open it. You see:
- What we sent: the alert exactly as we sent it.
- Response: what your tool replied, when it replied with content.
- Error: why the send failed, for failed rows.
- Click the refresh button next to Delivery log to load new rows.
If no alerts have gone out yet, the log shows No deliveries yet. Sample alerts from Test connection don’t appear in the log.
Change the configuration
- Edit any field under Configuration: the name, the link, the events, the campaigns, or custom headers.
- A bar appears with Unsaved changes. Click Save changes, or Discard to undo your edits.
You need a name, a link and at least one event to save. Otherwise the bar shows Add a name, a link and at least 1 event.
For your own server, Custom headers lists each header name with its value hidden. Click Add header to add one, or the × next to a header to remove it, then save.
To check the link still works, click Test connection. The result shows below the button.
Pause or resume alerts
Use the switch next to the integration name (or the switch on its row in the Integrations list). Turning it off sets the status to Paused and alerts stop until you turn it back on. This saves right away.
When alerts fail
If sends to your tool start failing, the page warns you:
- Some alerts failed: shows how many sends in a row failed. Alerts turn off after 5.
- Alerts are off: after 5 failed sends in a row, we turn the integration off and its status becomes Failed.
To fix a failed integration:
- Open a Failed row in the Delivery log and read the Error and Response.
- Fix the cause. Usually that means pasting a fresh link from your tool and clicking Save changes, or fixing your server.
- Click Test connection to check it works.
- Click Turn on again next to the integration name.
If you turn it on without fixing the cause, it will fail again and turn off again.
Delete an integration
Click Delete at the top of the page, then confirm in Delete integration?. Alerts stop going to that channel. You can’t undo this.
Related
- Send alerts to Slack and other tools
- Security settings: the signing secret for alerts sent to your own server
- Team emails