Emails your customers get
HighAdvocacy emails your customers when something changes with their submission. You choose which emails go out, what they say, and where replies go, in Settings → End-user notifications.
Before you start
You need the Owner or Admin role to change these emails.
The four emails
| Sent when | Default subject | |
|---|---|---|
| Submission received | A customer sends a submission | We received your {{platform_name}} submission |
| Submission approved | Your team approves a submission | Your {{platform_name}} submission was approved |
| Submission rejected | Your team rejects a submission | An update on your {{platform_name}} submission |
| Reward sent | A customer’s reward is sent | Your reward for {{campaign_name}} has been sent |
Each email has its own switch. Turning one off doesn’t affect the others, and doesn’t stop the matching alert to your team.
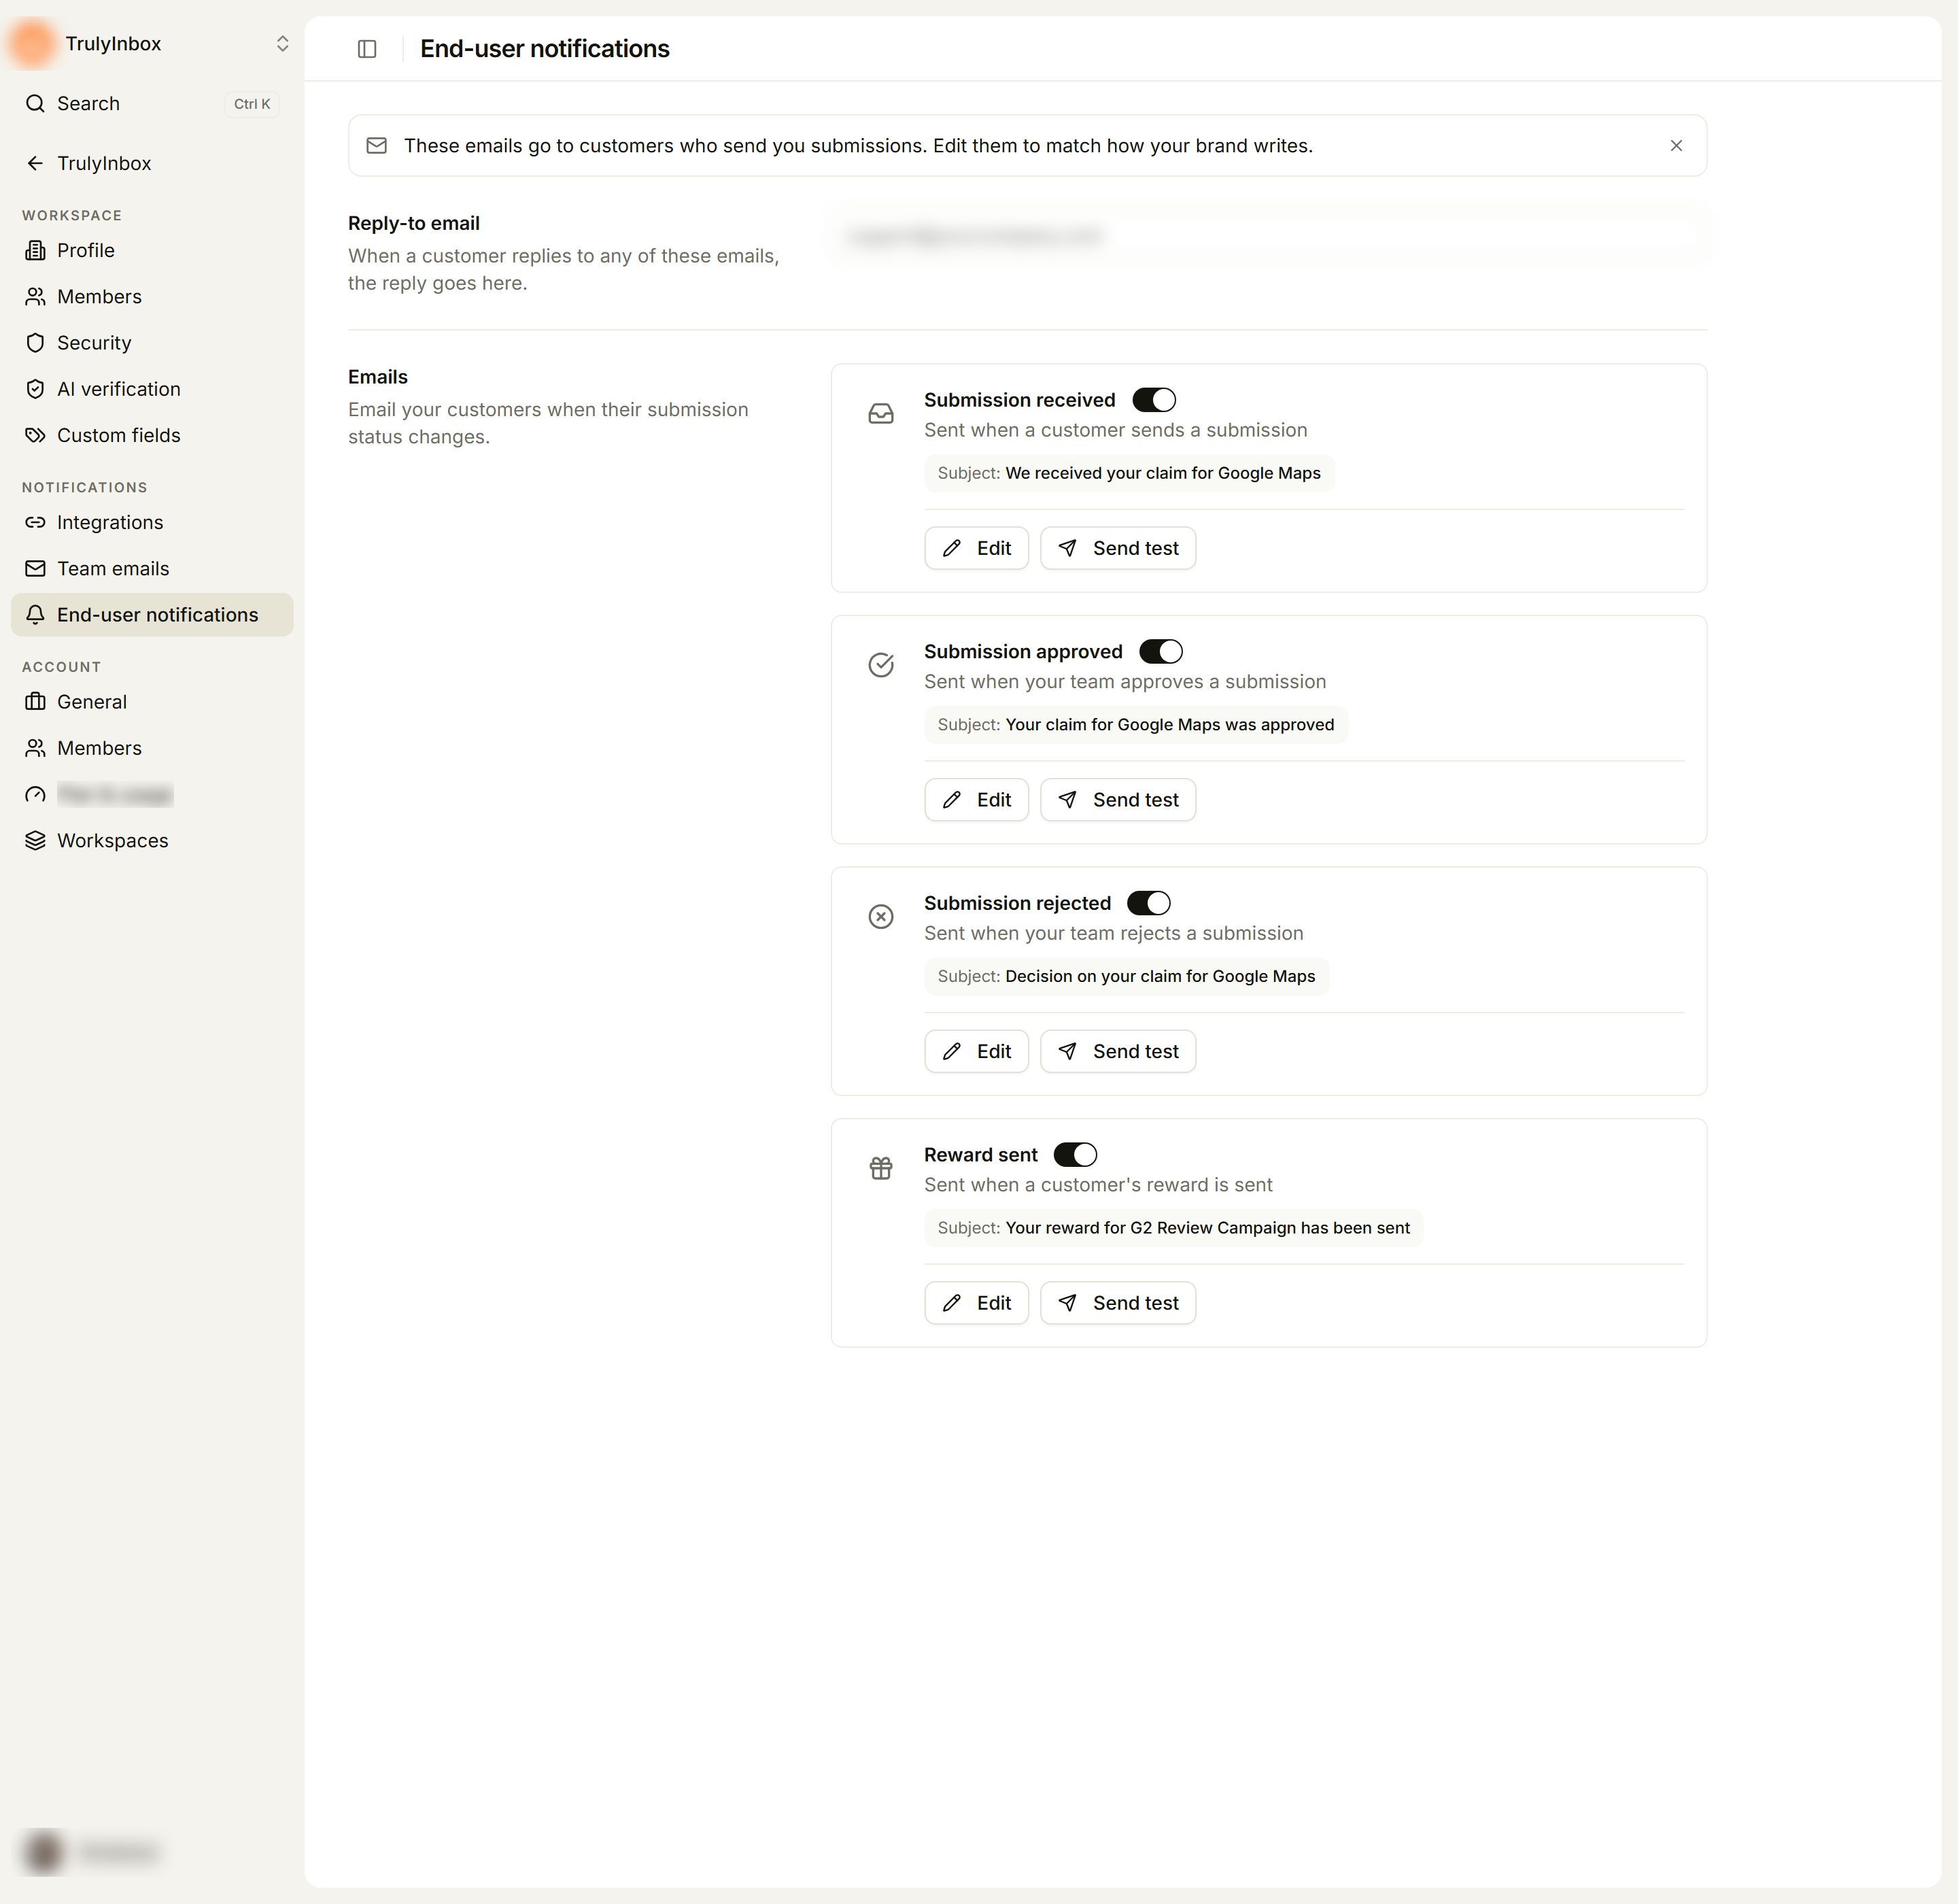
Turn emails on or off and set a reply-to address
- Open Settings at the bottom of the sidebar, then click End-user notifications under Notifications.
- Under Reply-to email, enter the address that should get customer replies, for example
support@yourcompany.com. When a customer replies to any of these emails, the reply goes there. - Under Emails, use the switch on each card to turn that email on or off.
- Click Save changes in the bar at the bottom. You see Customer emails saved.
Changes on this page are not saved until you click Save changes. Discard undoes them. If you try to leave with unsaved changes, you’re asked Leave without saving?
Edit an email
- Click Edit on the email’s card. The Edit: {email name} window opens.
- Change the Subject line and Email body.
- To add a variable, put your cursor where you want it and click the variable below the body.
- Check the Preview on the right. It fills the variables with sample values.
- Click Apply changes to keep your edits, then click Save changes on the page.
To go back to the original wording, click Reset to default in the edit window, then save the page.
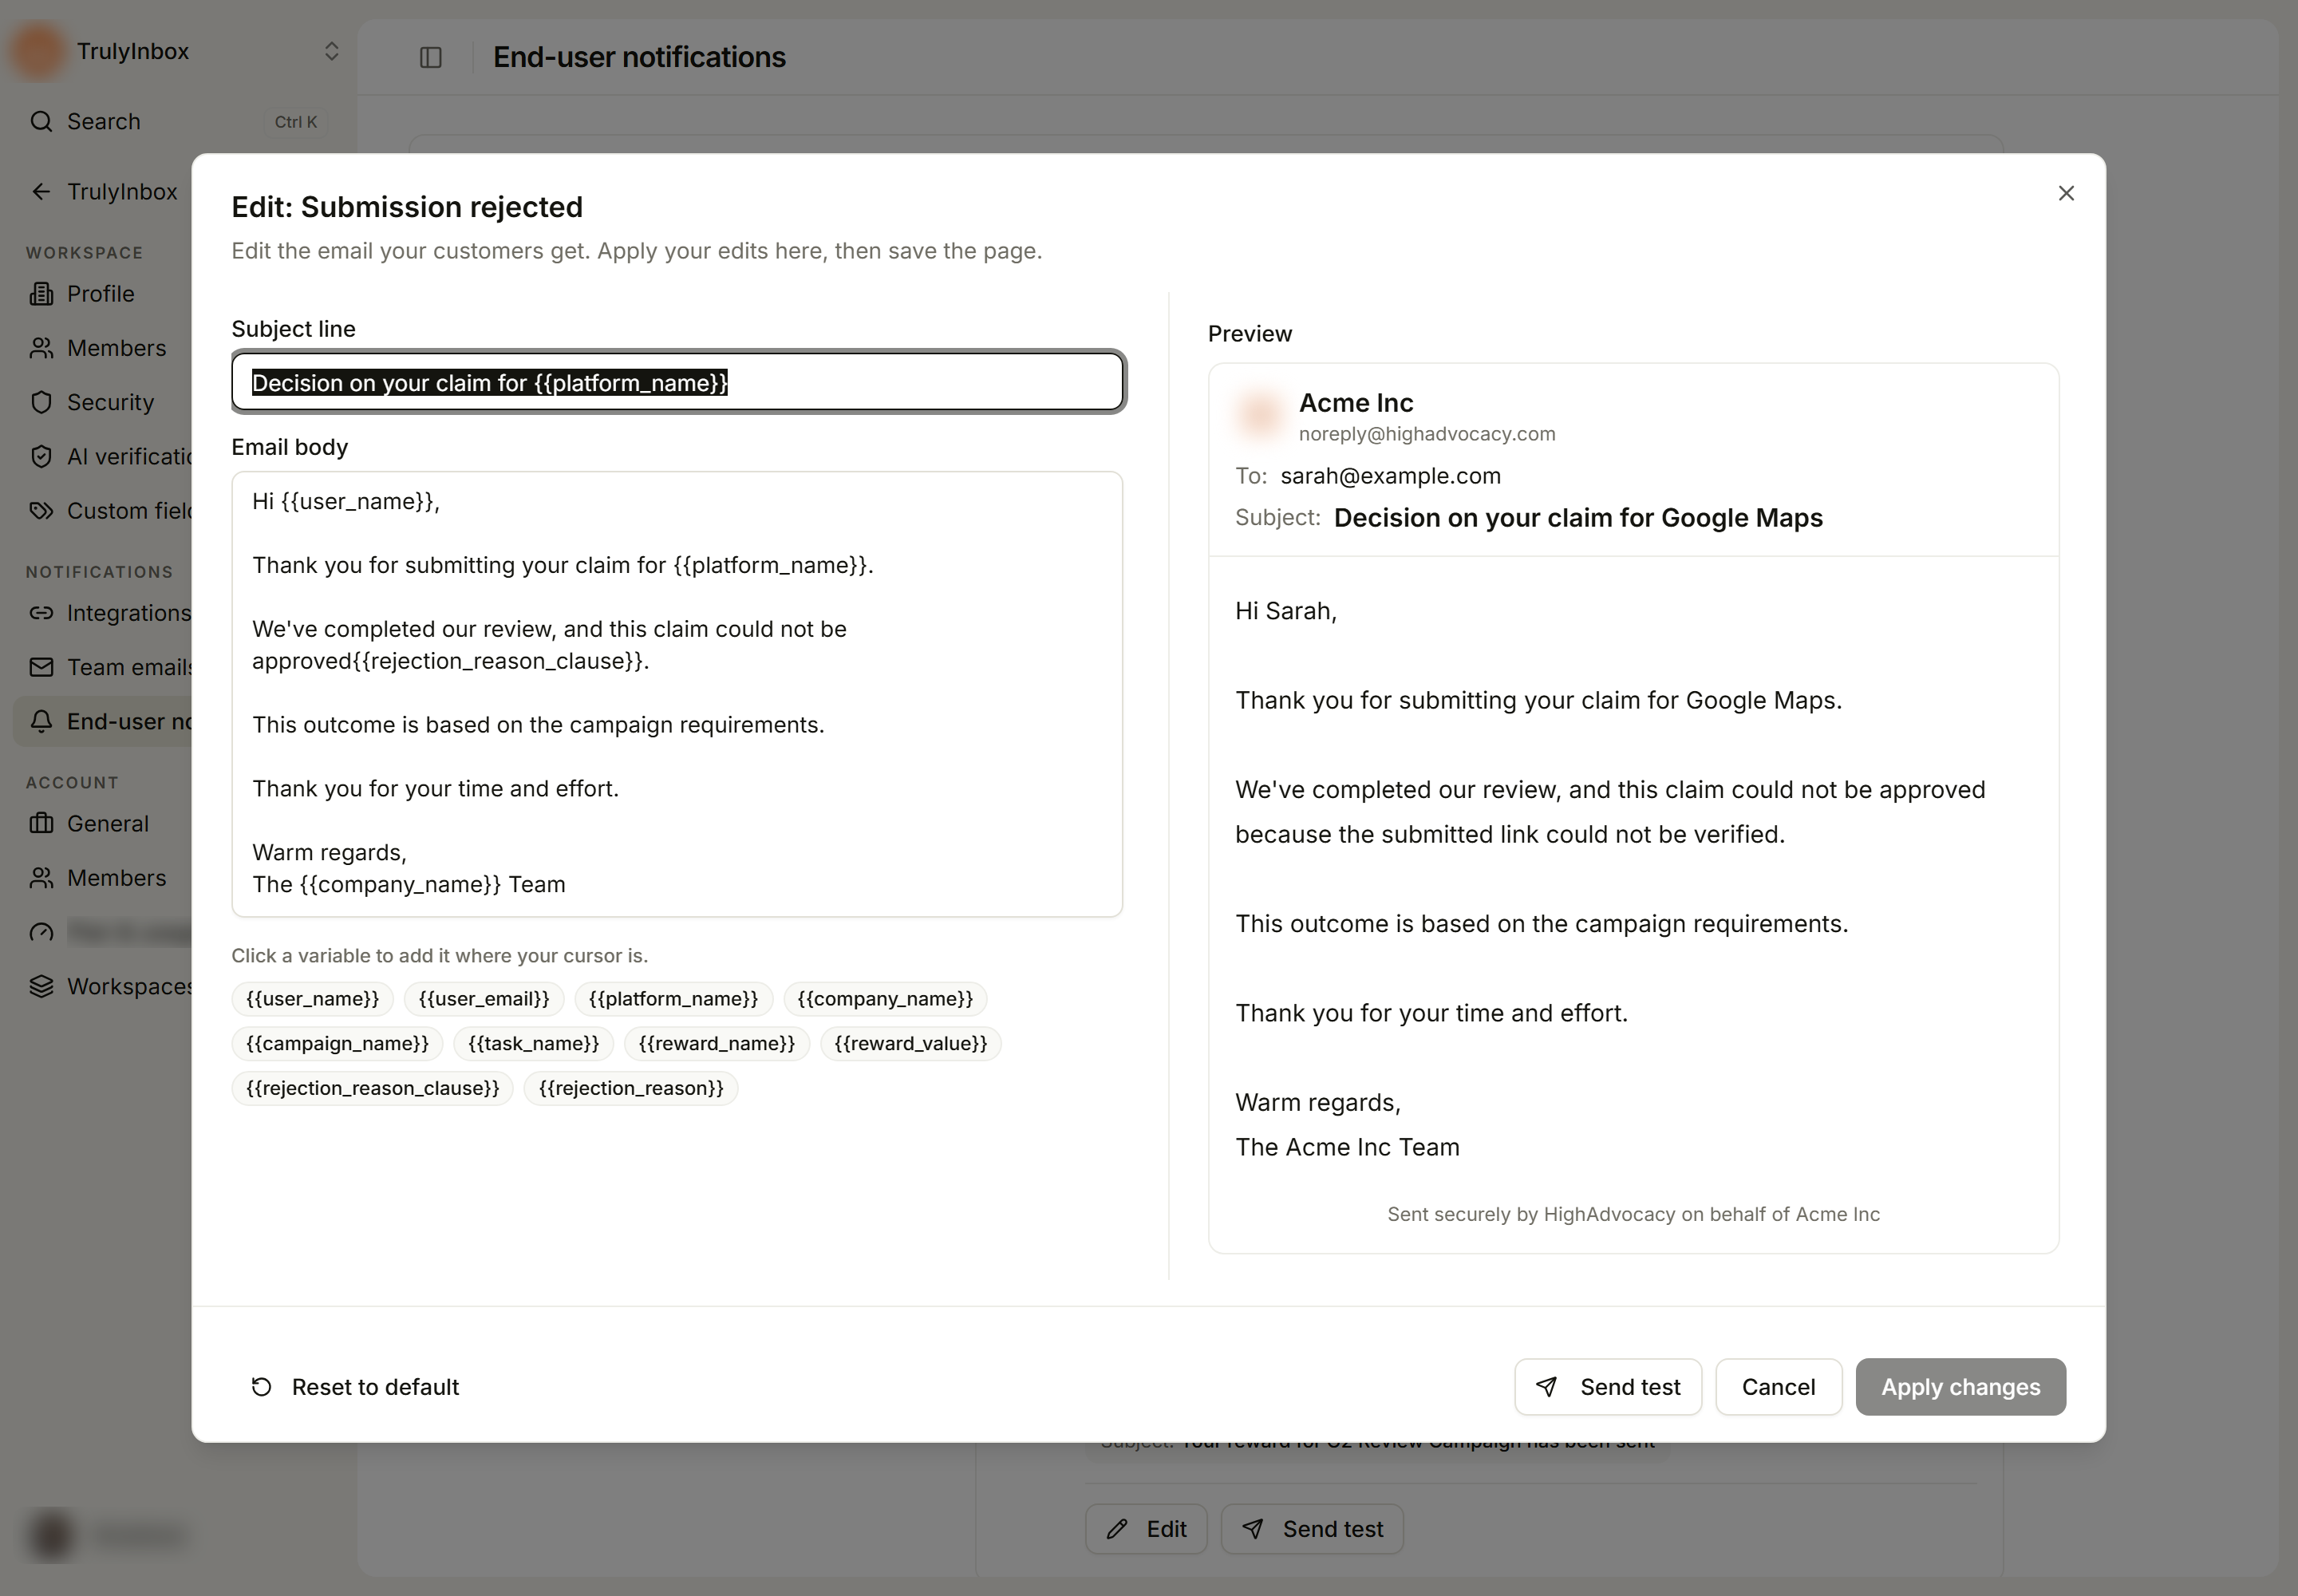
Variables you can use
| Variable | What it adds | Example |
|---|---|---|
{{user_name}} | Customer’s name | Sarah |
{{user_email}} | Customer’s email | sarah@example.com |
{{platform_name}} | Site where the customer did the task | Google Maps |
{{company_name}} | Your company name | Acme Inc |
{{campaign_name}} | Name of the campaign | G2 Review Campaign |
{{task_name}} | Task the customer did | Write a G2 Review |
{{reward_name}} | Name of the reward | $25 Amazon Gift Card |
{{reward_value}} | Reward value | $25 |
{{rejection_reason_clause}} | Short reason added to a sentence | ” because the submitted link could not be verified” |
{{rejection_reason}} | Why you rejected it, if you added a reason | Reason: We could not open the review link. |
Rejection reasons
When someone on your team rejects a submission, they can add a reason. The reject window says the reason is emailed to the person who sent it, and its Edit the email link brings you to this page.
{{rejection_reason_clause}}fits inside a sentence. The default rejected email uses it like this: “We checked it, and we could not approve it{{rejection_reason_clause}}.” With a reason, the sentence ends “…could not approve it because the submitted link could not be verified.” Without one, it ends “…could not approve it.”{{rejection_reason}}adds the reason on its own, for example on a separate line.
Send a test email
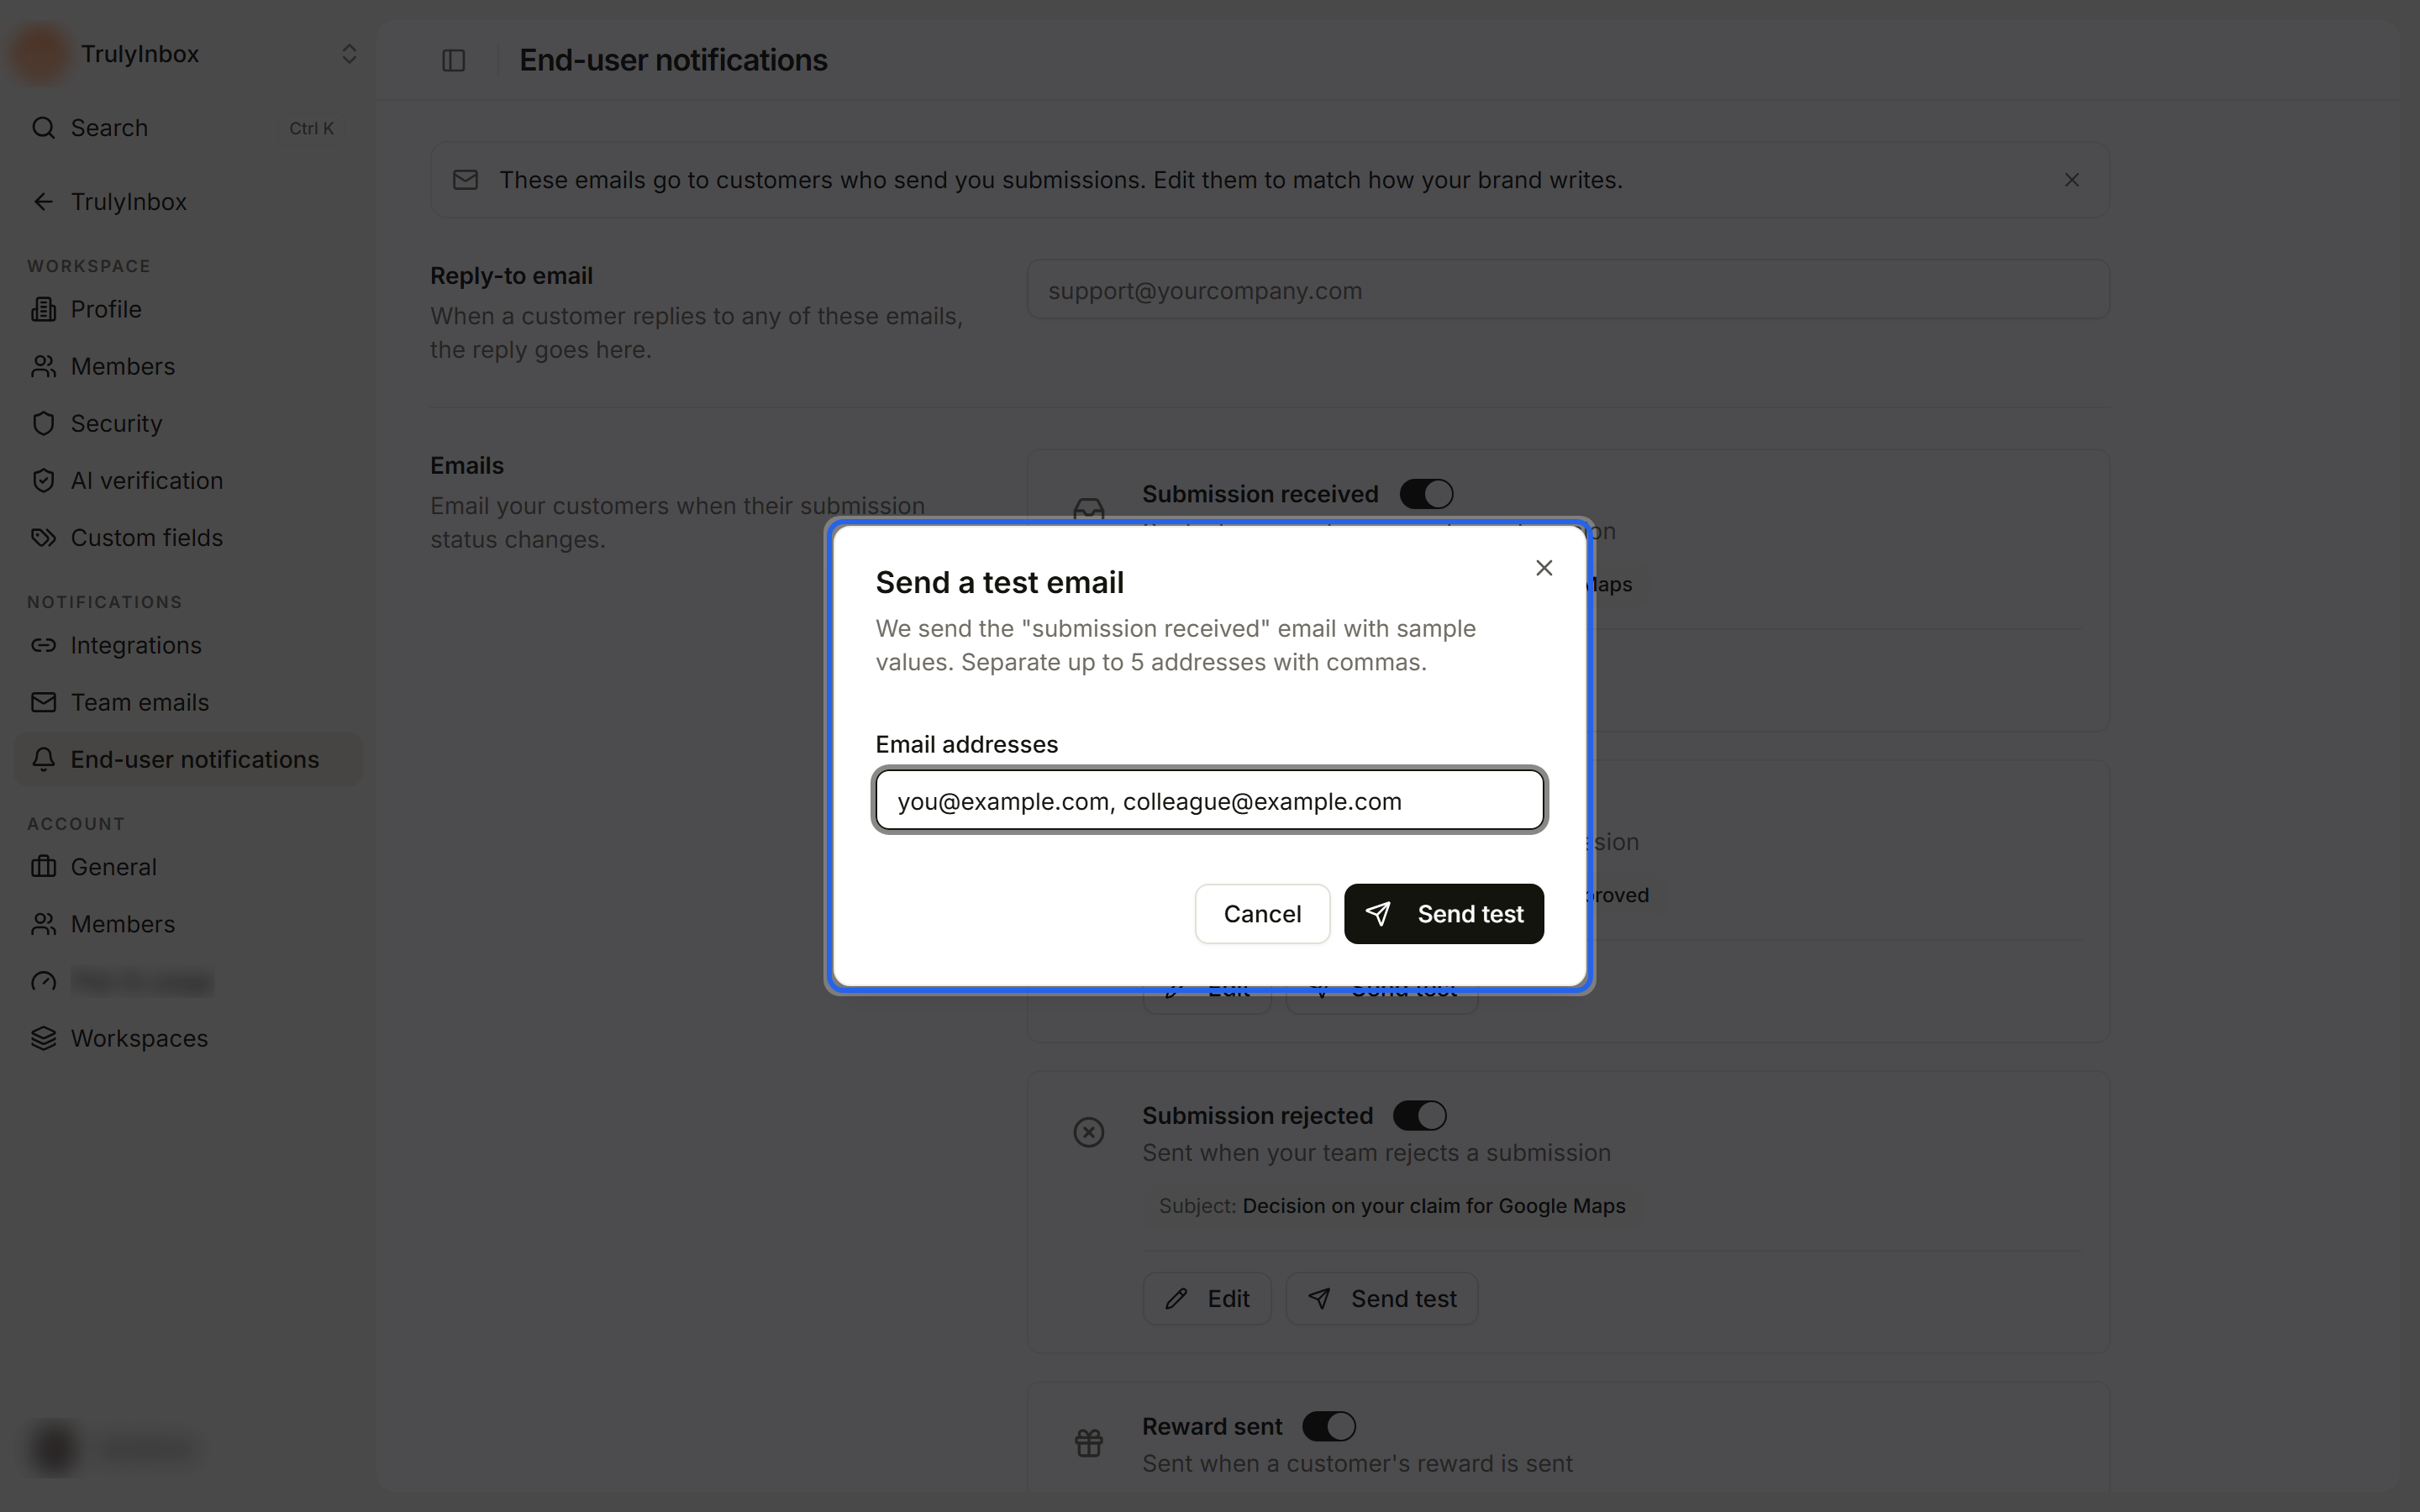
- Click Send test on the email’s card. You can also click Send test in the edit window to test your unsaved edits.
- In Send a test email, type up to 5 addresses in Email addresses, separated by commas.
- Click Send test. You see Test email sent to and the addresses.
The test uses sample values for the variables. Send test on a card is greyed out while that email is turned off.
| Message | What to do |
|---|---|
| Enter at least 1 email address. | Type an address. |
| You can add up to 5 email addresses. | Remove some addresses. |
| Check this email address: … | Fix the address shown. |
What customers see
- The email comes from
noreply@highadvocacy.comwith your company name and logo at the top. Your company name and logo come from your workspace profile. See Workspace profile. - If you set a Reply-to email, replies go there.
- The footer reads “Sent securely by HighAdvocacy on behalf of” your company name.
- For one submission, a customer typically gets the received email, then the approved or rejected email, then the reward sent email, depending on which emails you have turned on.
Campaign reminder
When you share a campaign, a note says “Customers get an email when we receive, approve or reject their submission.” Click Edit emails to come to this page. The emails are set for the whole workspace, not per campaign.