Create a campaign
Build a new campaign from scratch and put it live. It takes a few minutes if your rewards are already in the Reward catalog.
Before you start
- You need the Owner or Admin role.
- Create at least one reward in Rewards → Catalog, or plan to choose No reward. You can also create a reward from inside the builder.
- Save your review site links in Workspace profile so the builder can fill them in for you.
- If you finished onboarding, your onboarding campaign may be waiting under the Drafts tab on the Campaigns page. Open it and pick up from step 3.
Start a new campaign
-
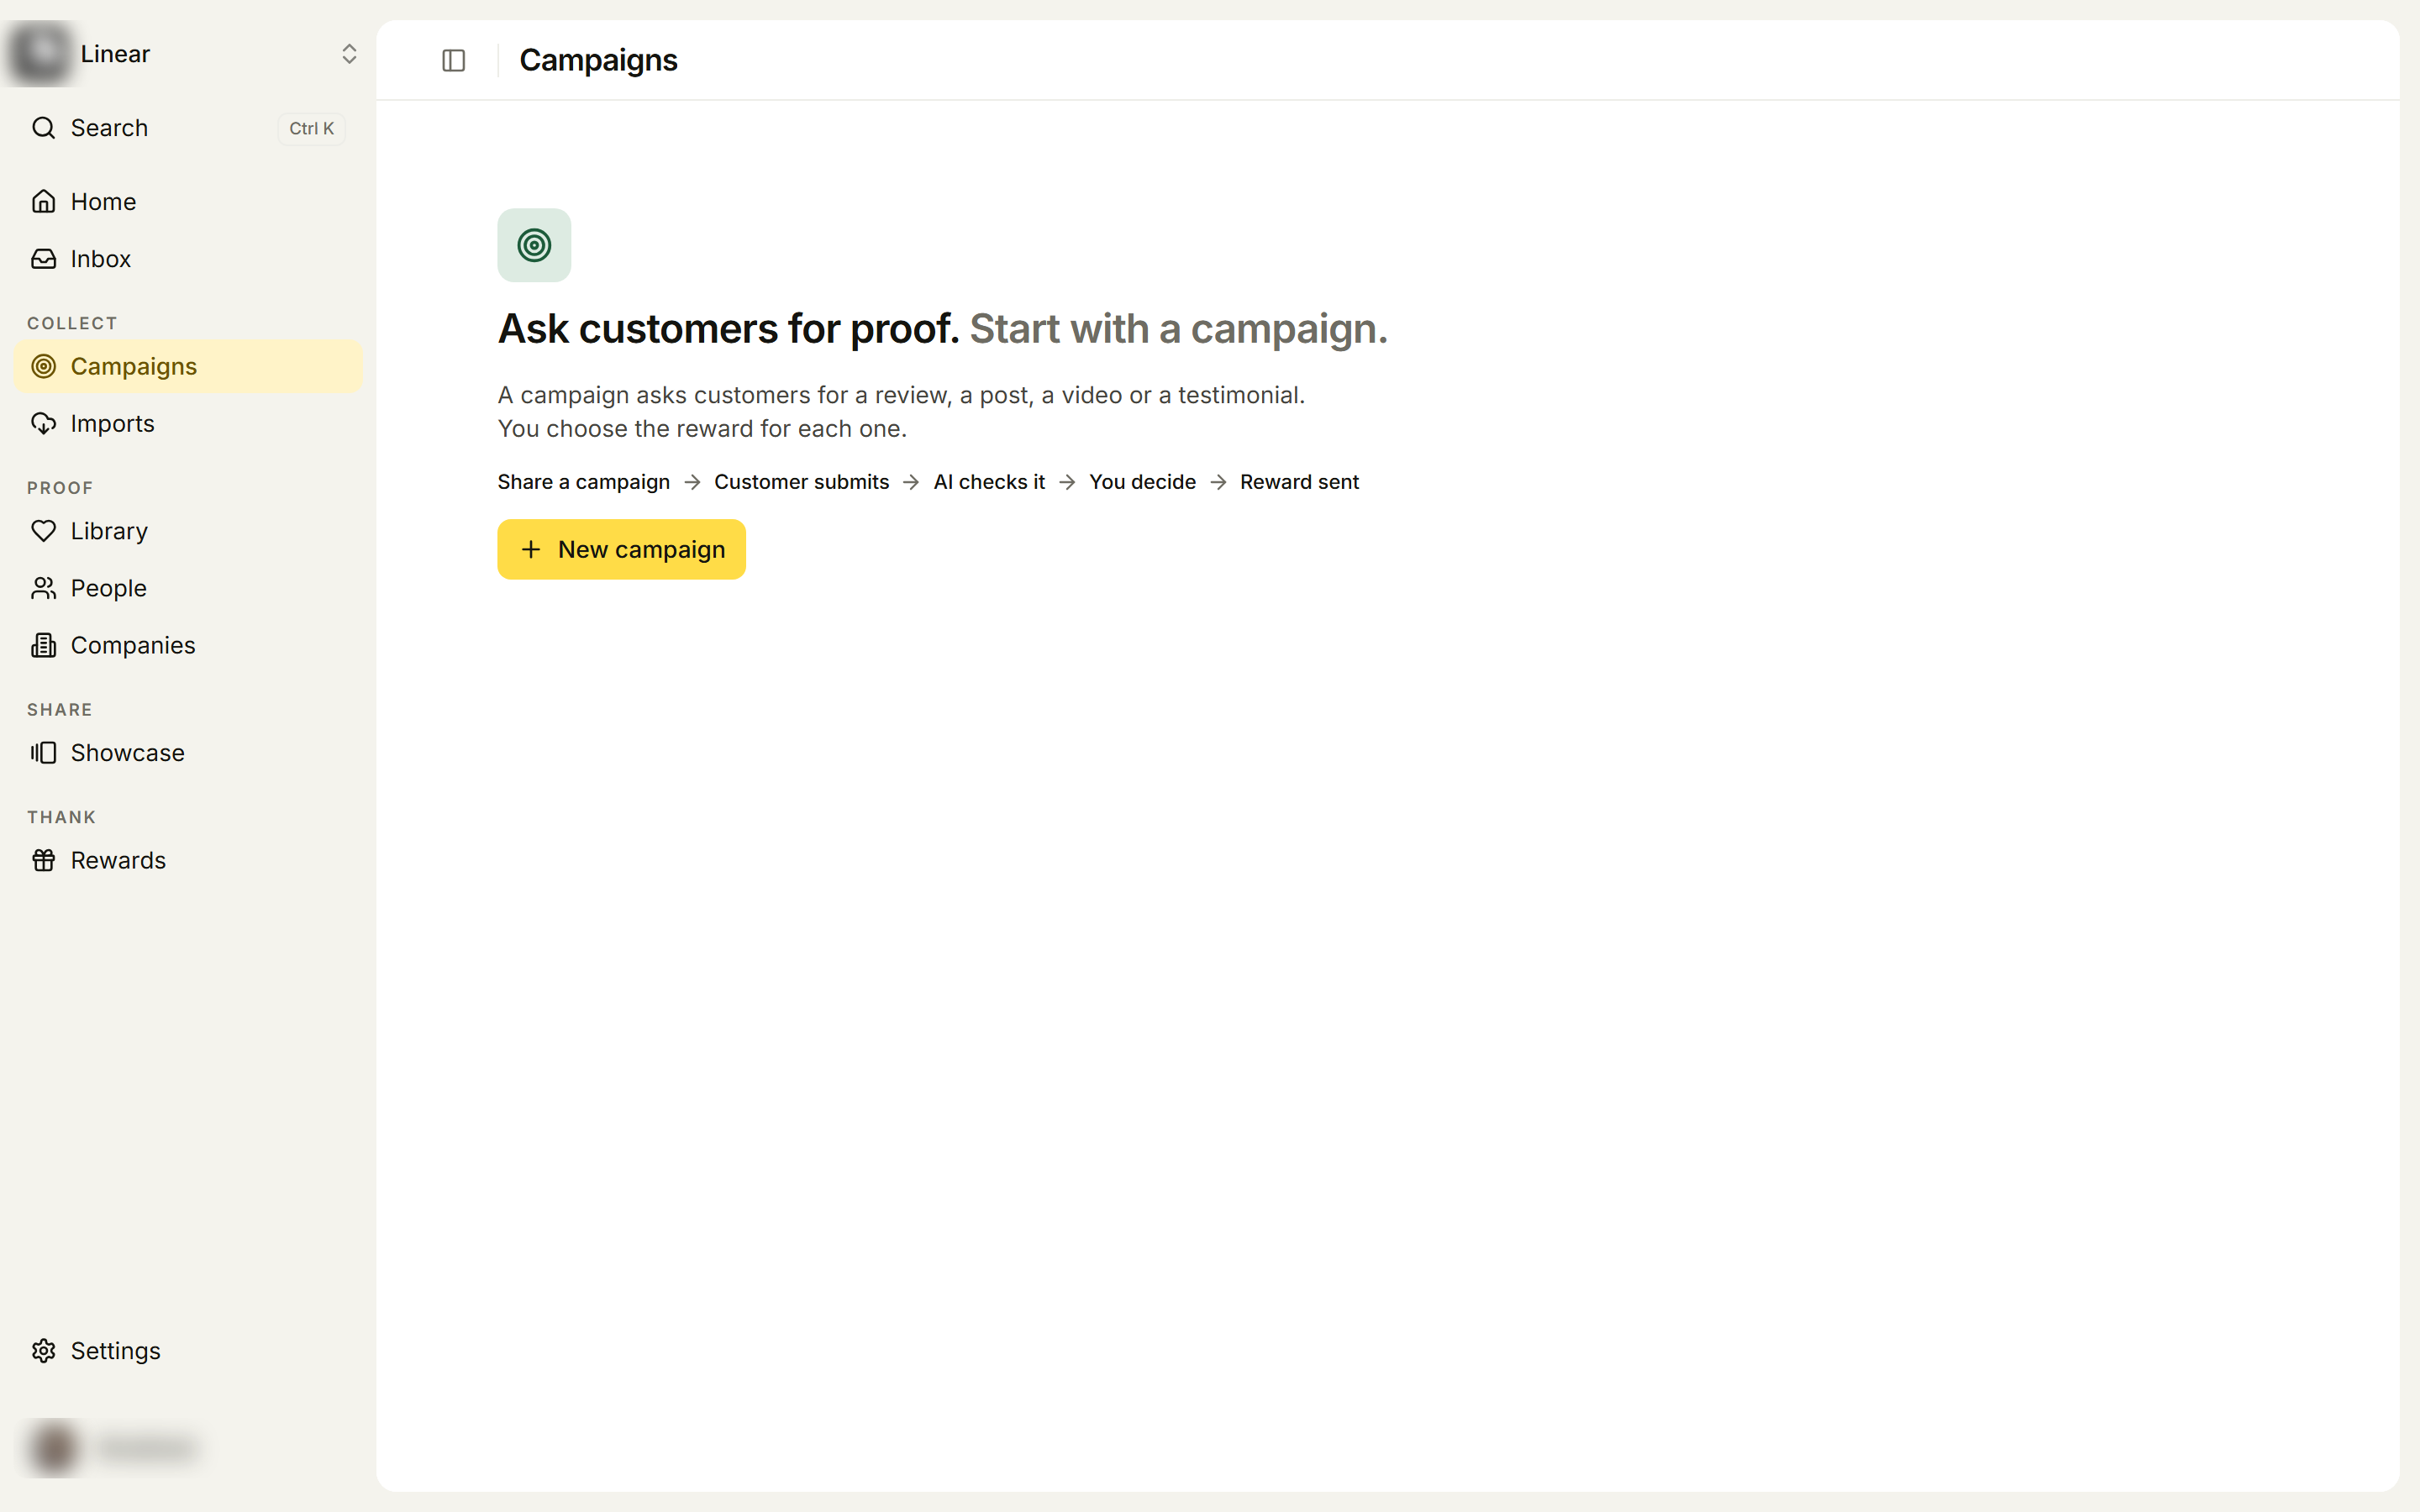
Go to Campaigns and click New campaign. If you have no campaigns yet, the page reads “Ask customers for proof. Start with a campaign.” with the New campaign button.
-
The builder opens as Untitled campaign. Click the name at the top to rename it.
Nothing is saved until you make your first change. After that the campaign is a draft and saves as you go (the header reads Draft · saves as you go).
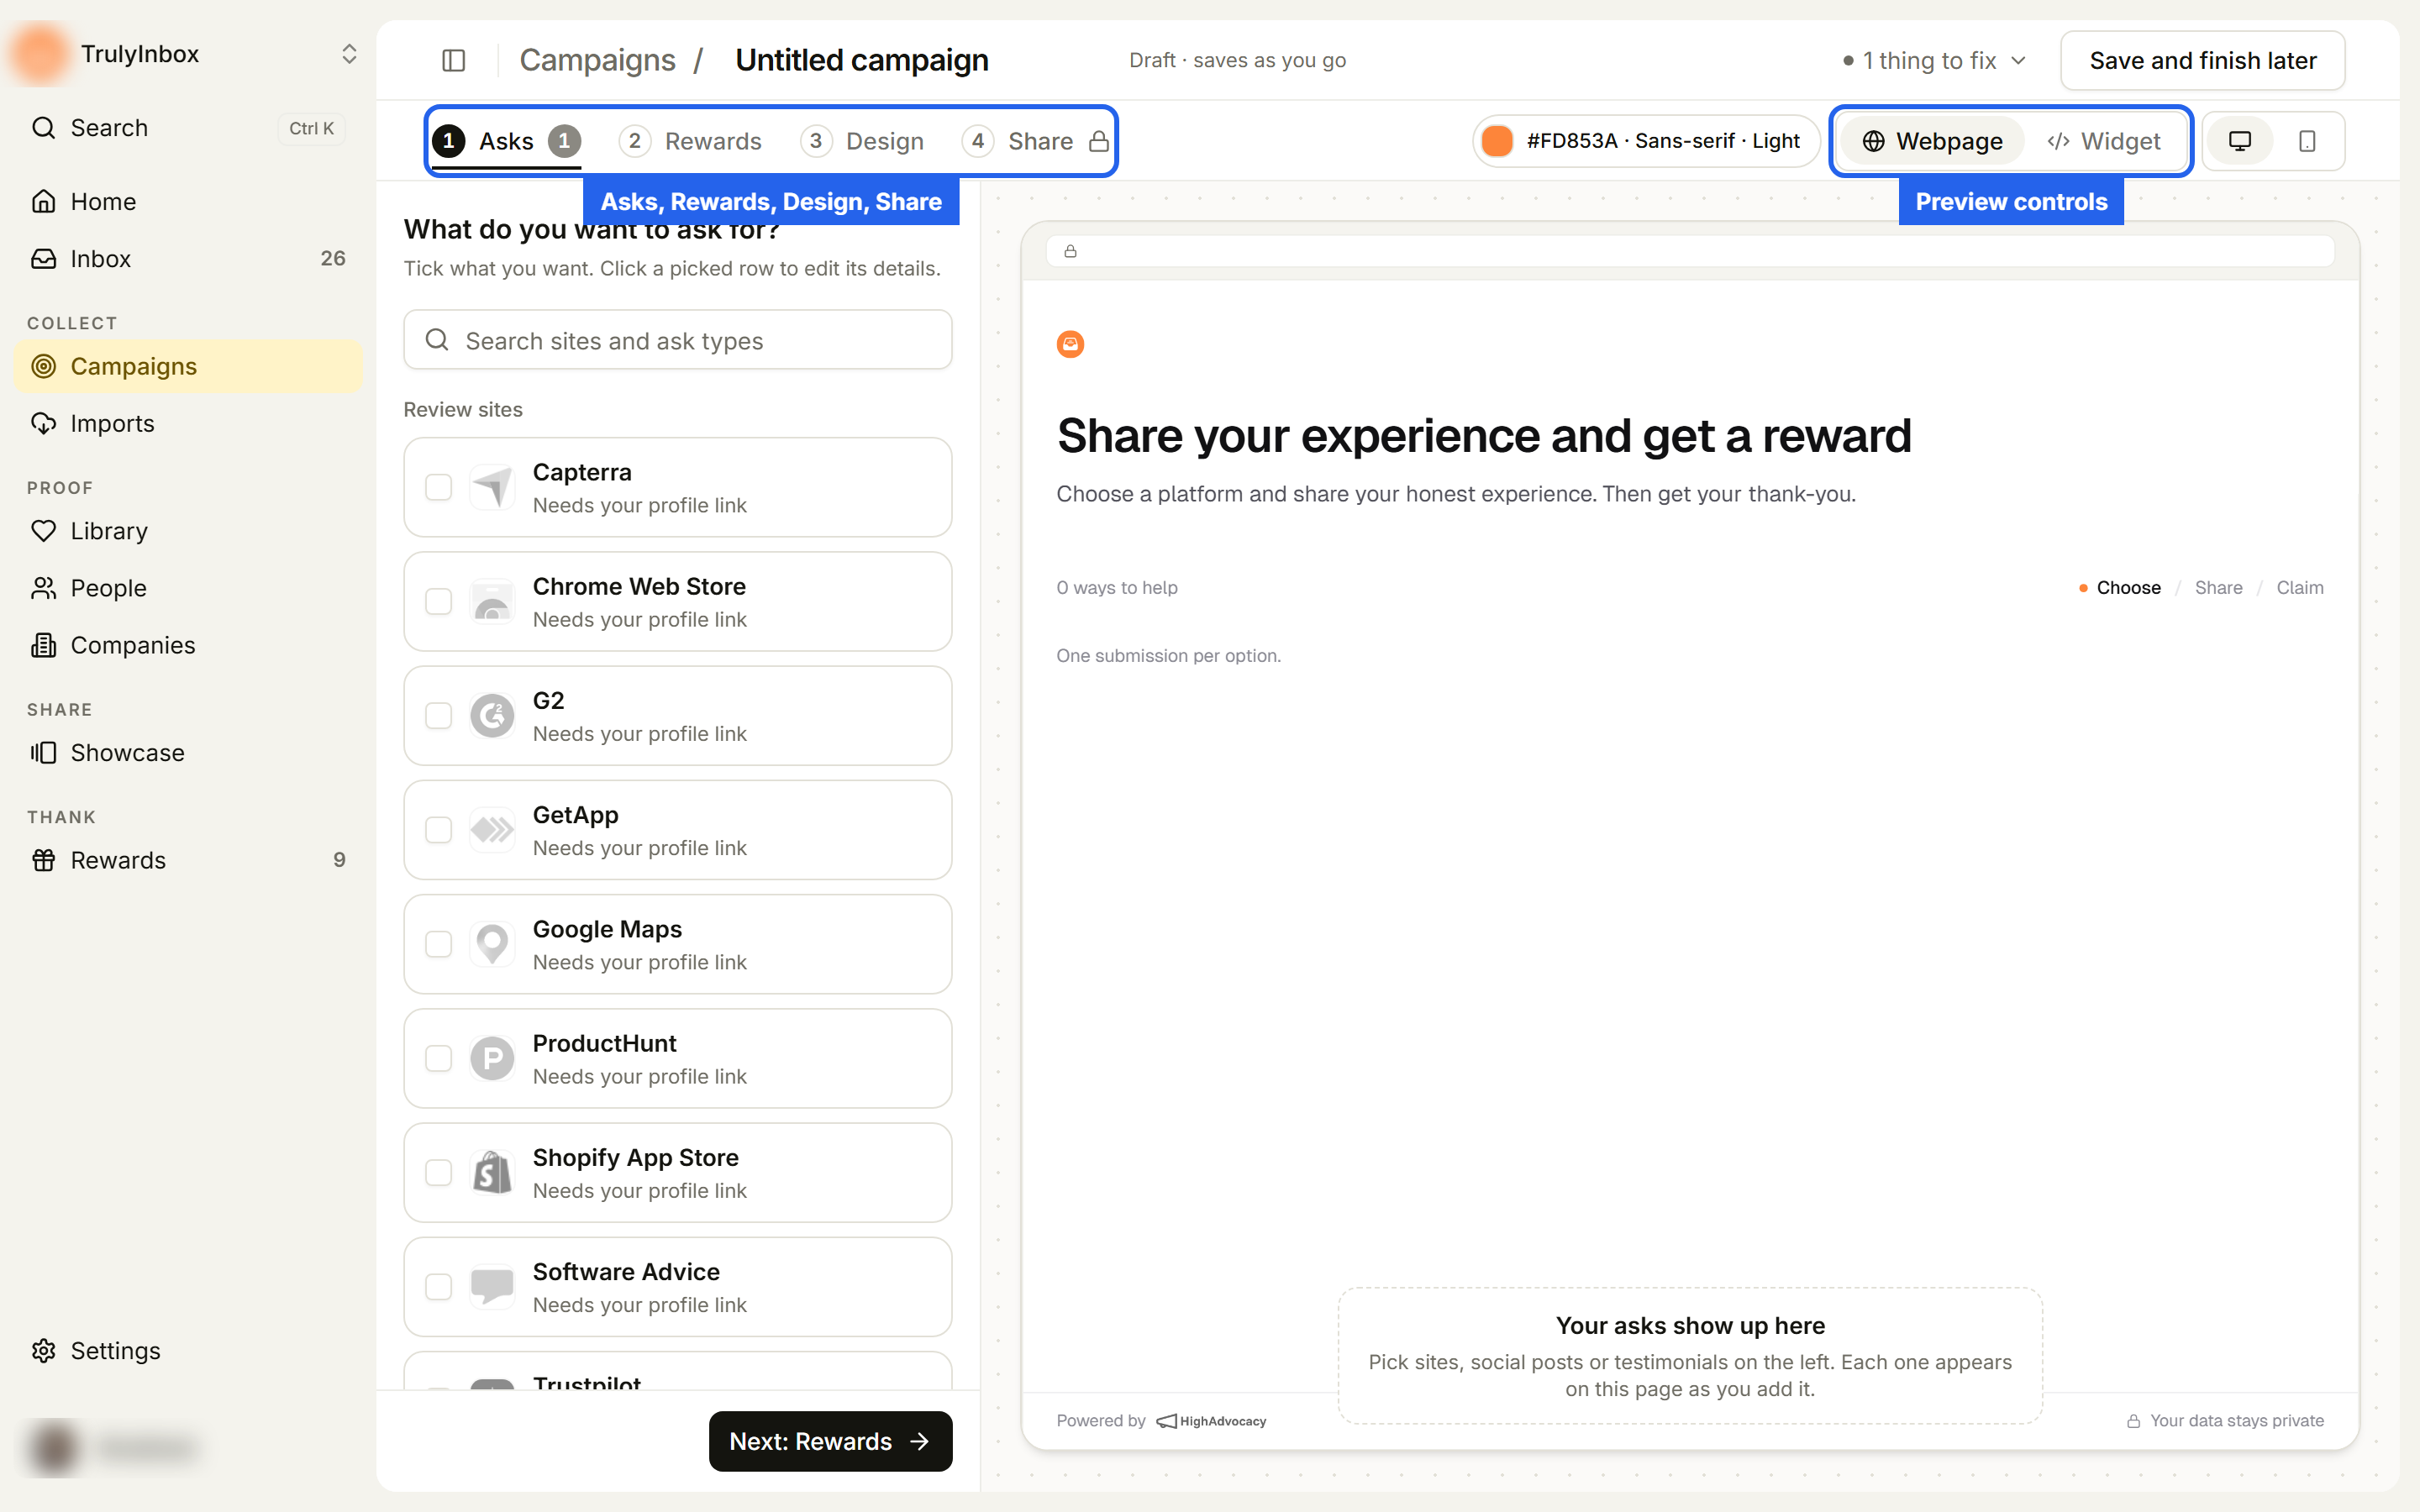
The builder has two halves. The left panel holds the current tab. The right side is a live preview of the page your customers see. Use Webpage / Widget and the device icons at the right end of the tab bar to switch what the preview shows. Click a card in the preview to open that ask’s details on the left.
Build it tab by tab
- Asks. Under “What do you want to ask for?”, tick the review sites, social platforms and testimonials you want. Click a ticked row to open its details. Then click Next: Rewards.
- Rewards. Under “What does each person get?”, pick a reward for each ask, or use Set one reward for all. Then click Next: Design. See Set rewards for a campaign.
- Design. Check the Brand row, then the Headline and Subtext for the webpage and the widget. You can also type straight on the preview. See Design your campaign.
- Still on Design, review Before you go live: AI verification, Proof customers send and Reward approval. You can change these later in Share.
- Click Go live.
You can click any tab at any time. Only Share stays locked (“Opens after you go live”) until the campaign is live.
Fix what blocks Go live
A number on a tab means something on that tab needs fixing. The numbers are grey while you set up a new campaign and turn red once you press Go live.
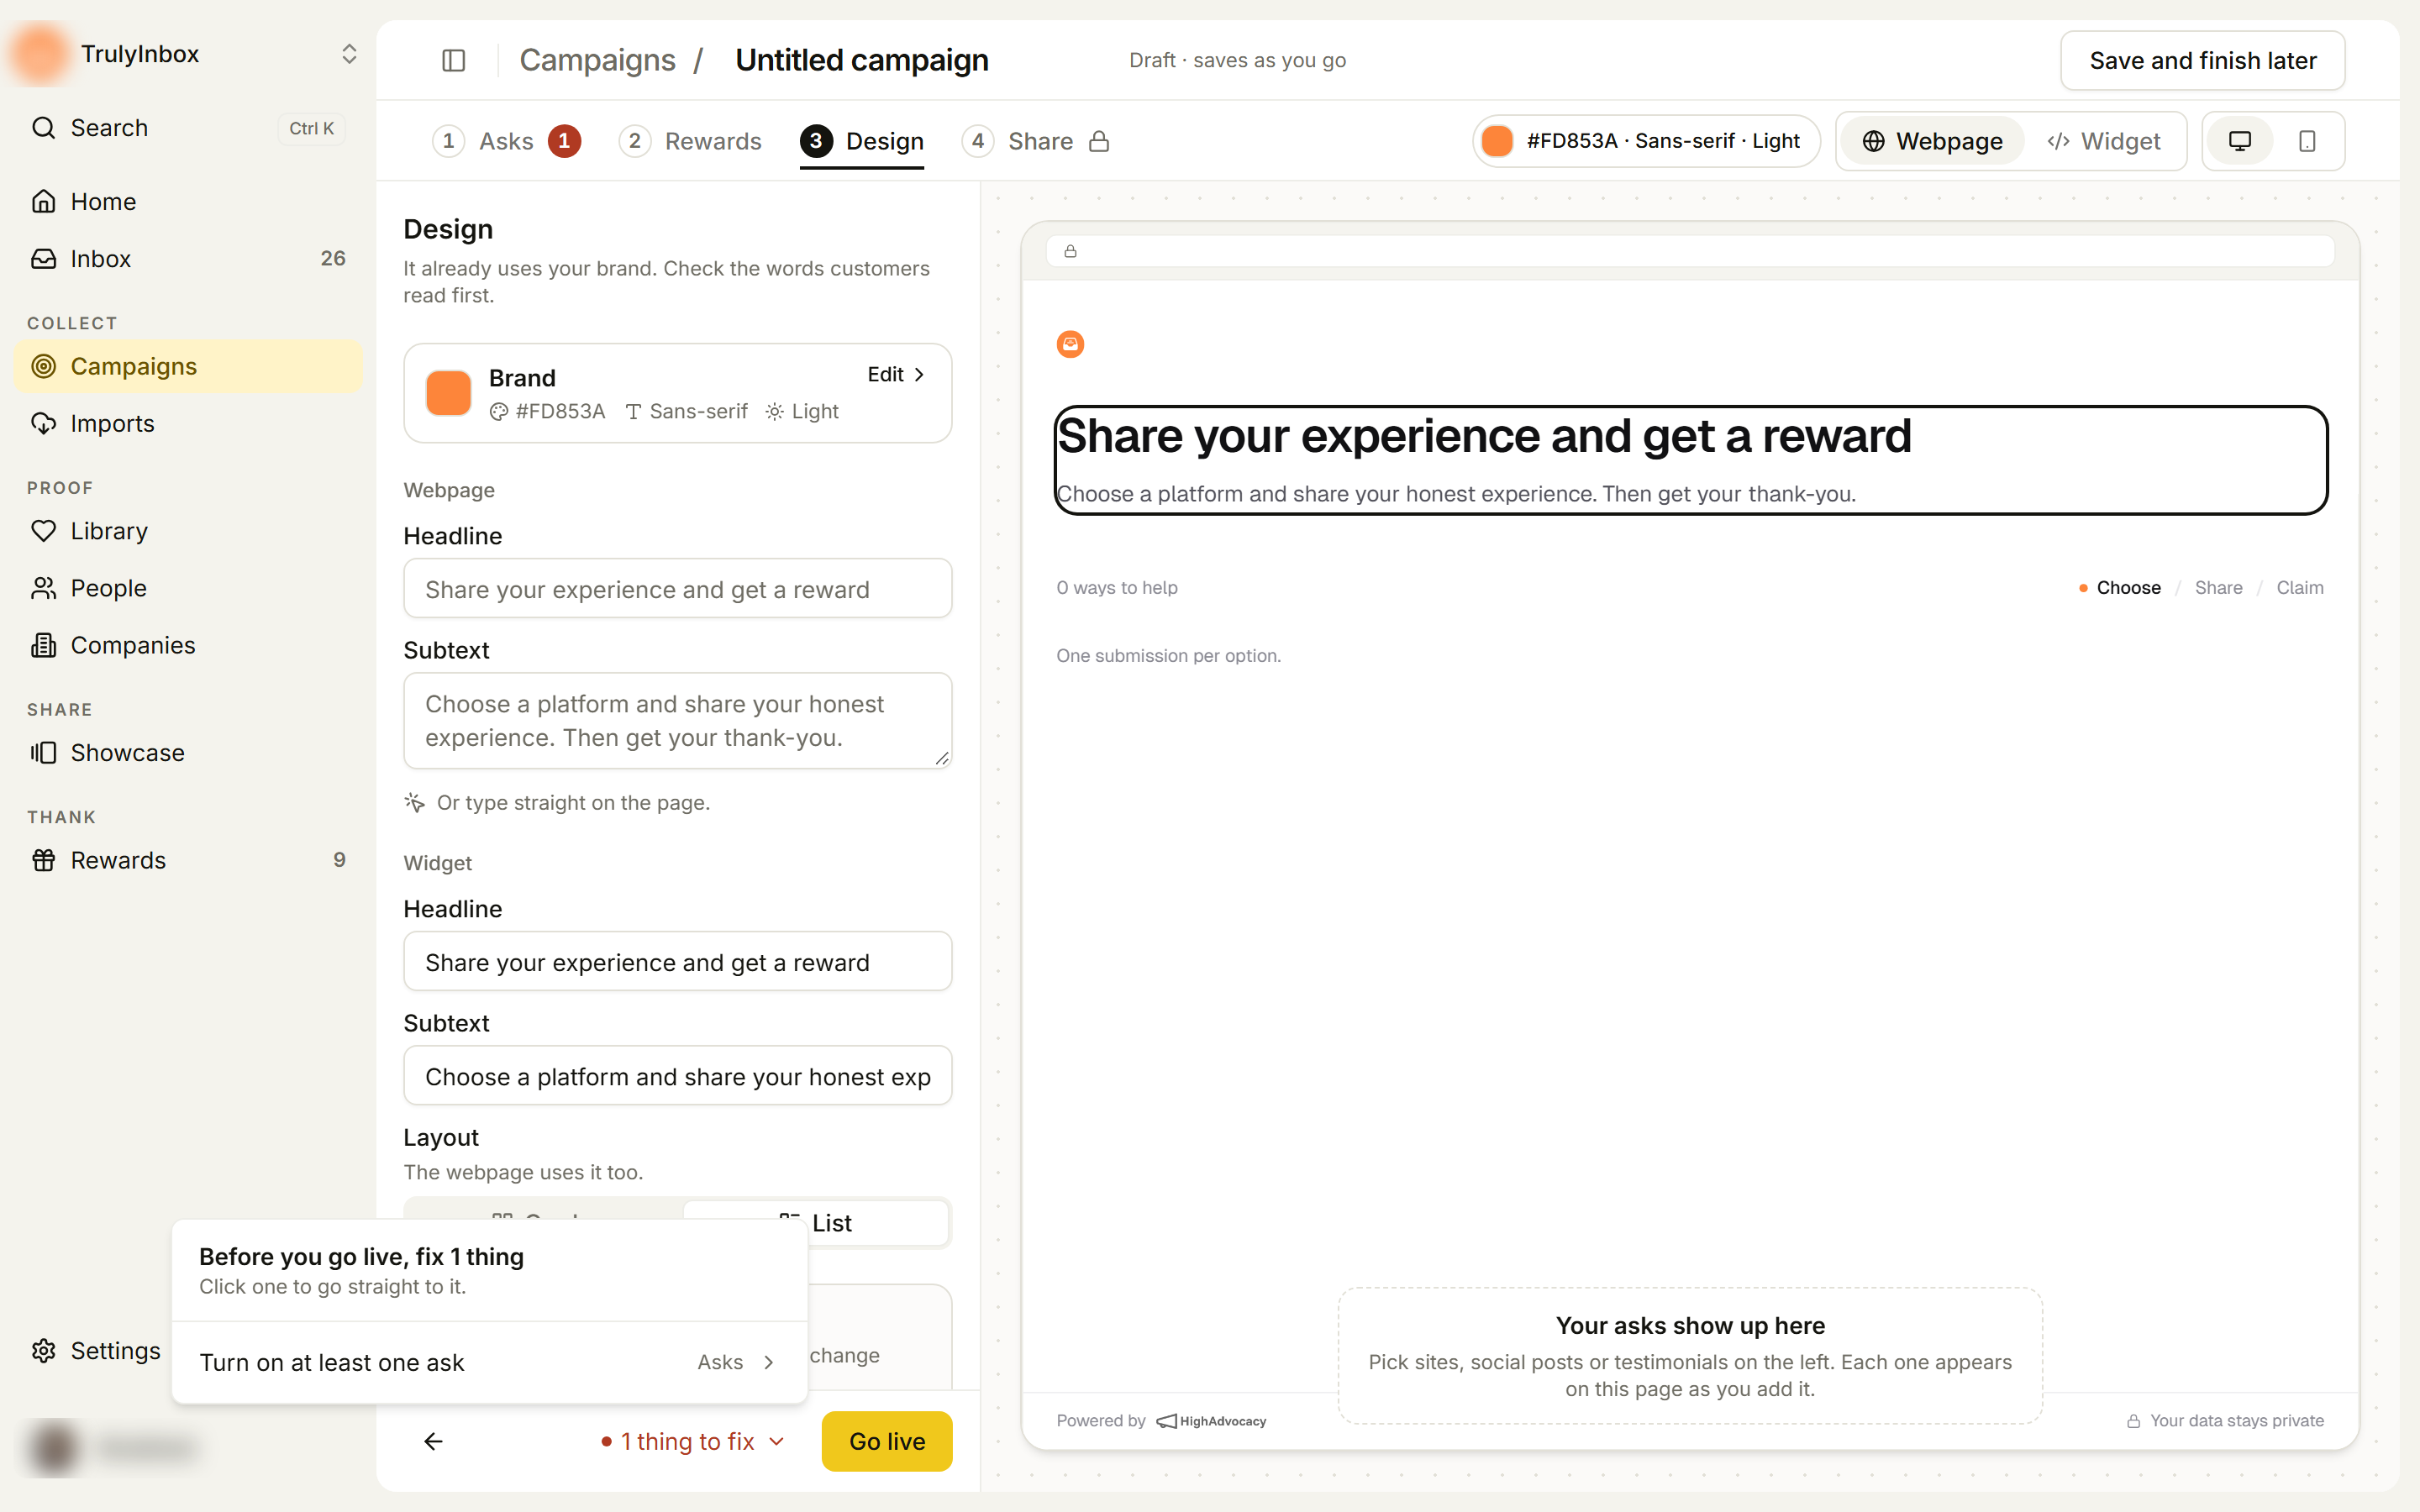
If anything is missing when you press Go live, nothing launches. A list opens instead: “Before you go live, fix N things”. Click an item to jump straight to the field.
| Message | What to do |
|---|---|
| Turn on at least one ask | Tick at least one row on Asks. |
| Name needs a post URL | Paste the post link on that engagement. |
| Name: the minimum must be less than the maximum | Fix Min. characters and Max. characters on the written testimonial. |
| Name needs a reward or “No reward” | Pick a reward on Rewards. |
| The webpage headline is empty (or subtext, or the widget’s) | Fill in the copy on Design. |
| Turn on the webpage or the widget | Turn a channel back on in Share. |
You can also open the same list any time from N things to fix in the header.
What happens when you go live
- The campaign turns Active and you see “Your campaign is live”.
- The builder opens the Share tab, with your webpage link and widget code. See Share your campaign.
- New submissions land in the Inbox.
Save and finish later
Click Save and finish later in the header to leave a new campaign. You see “Saved as a draft. Finish it any time.” and the campaign waits under the Drafts tab on the Campaigns page.
To finish a draft, open it from Drafts. On the campaign page, click Finish setup. Drafts keep saving as you edit, so Close takes you back.
Related
- Manage campaigns: pause, edit a live campaign, duplicate or delete
- Help customers write with Smart Draft
- What customers see
- Set up AI verification