Design your campaign page and widget
The Design tab of the campaign builder controls how your hosted page and your widget look, and the first words customers read. A new campaign already starts with your workspace brand, so most of the time you only check the copy.
Design settings belong to this campaign only. Changing them does not touch your other campaigns or your workspace settings.
Before you start
- You need the Owner or Admin role to edit a campaign.
- Open the builder: Campaigns → New campaign, or open a campaign and click Edit. Then click the Design tab (step 3).
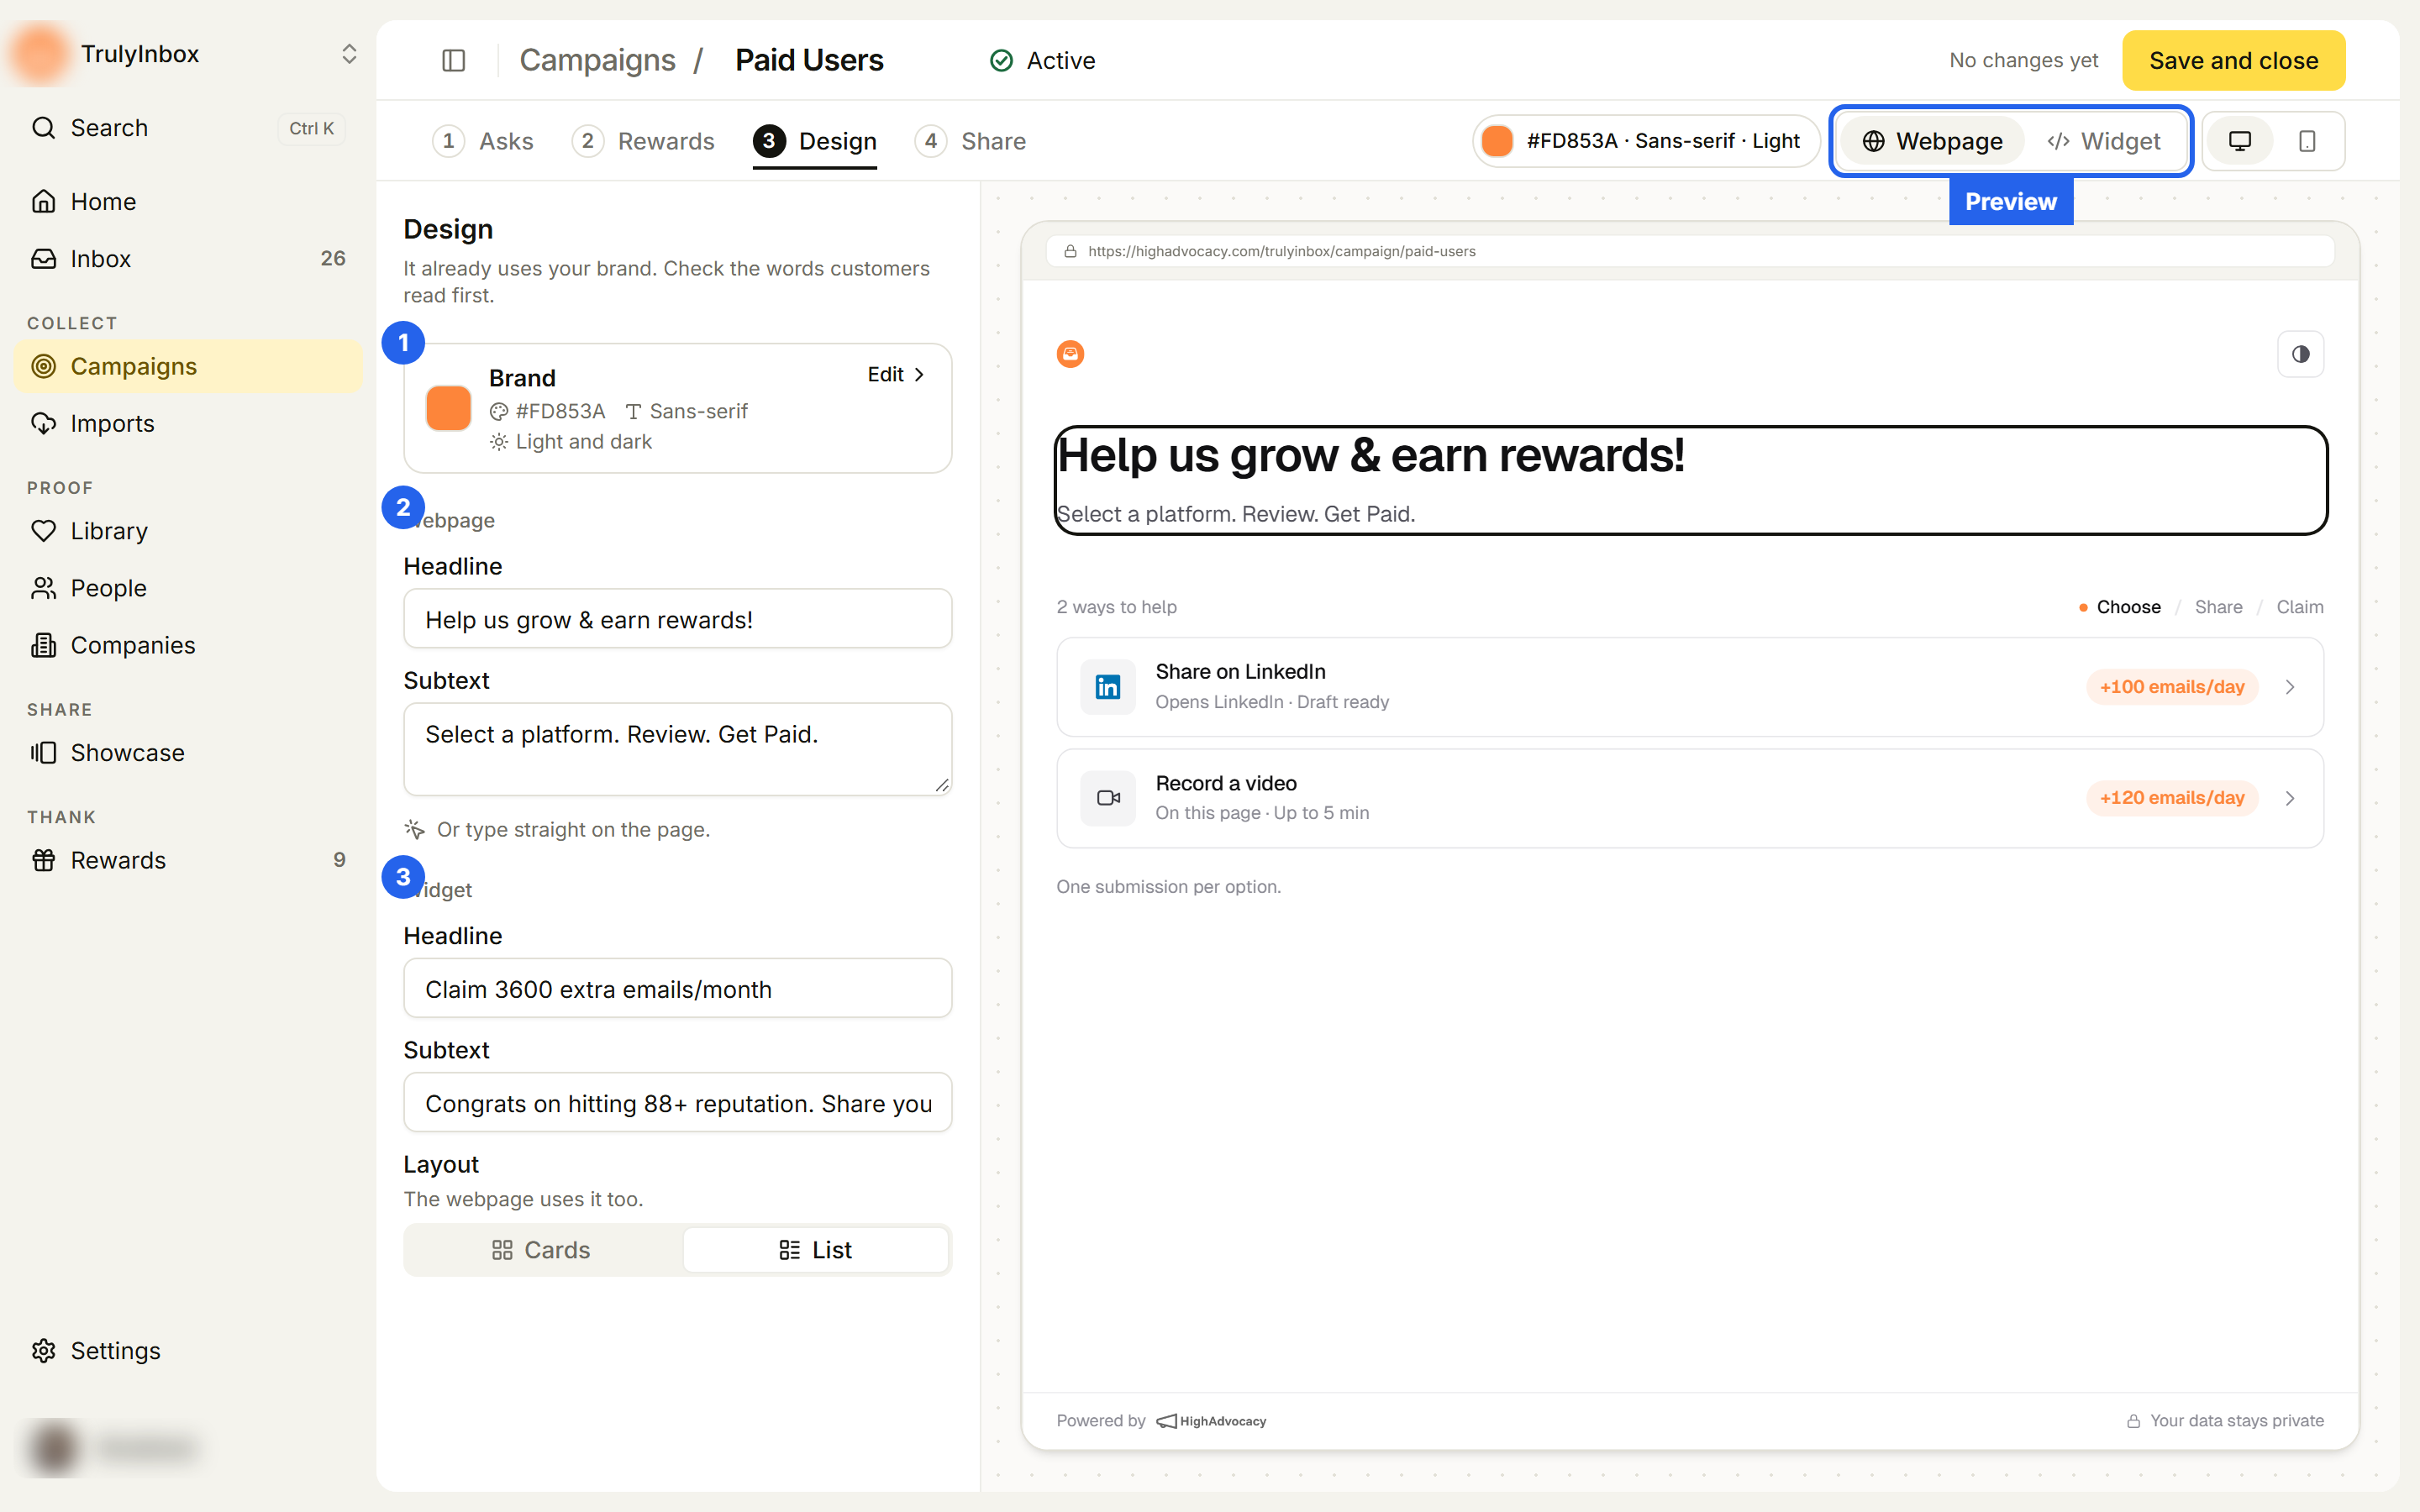
The Design tab has three parts: Brand (1), the Webpage copy (2) and the Widget copy (3). The preview on the right is the real page your customers see. Use Webpage / Widget and the desktop and mobile icons at the right end of the tab bar to switch what it shows.
Set your brand
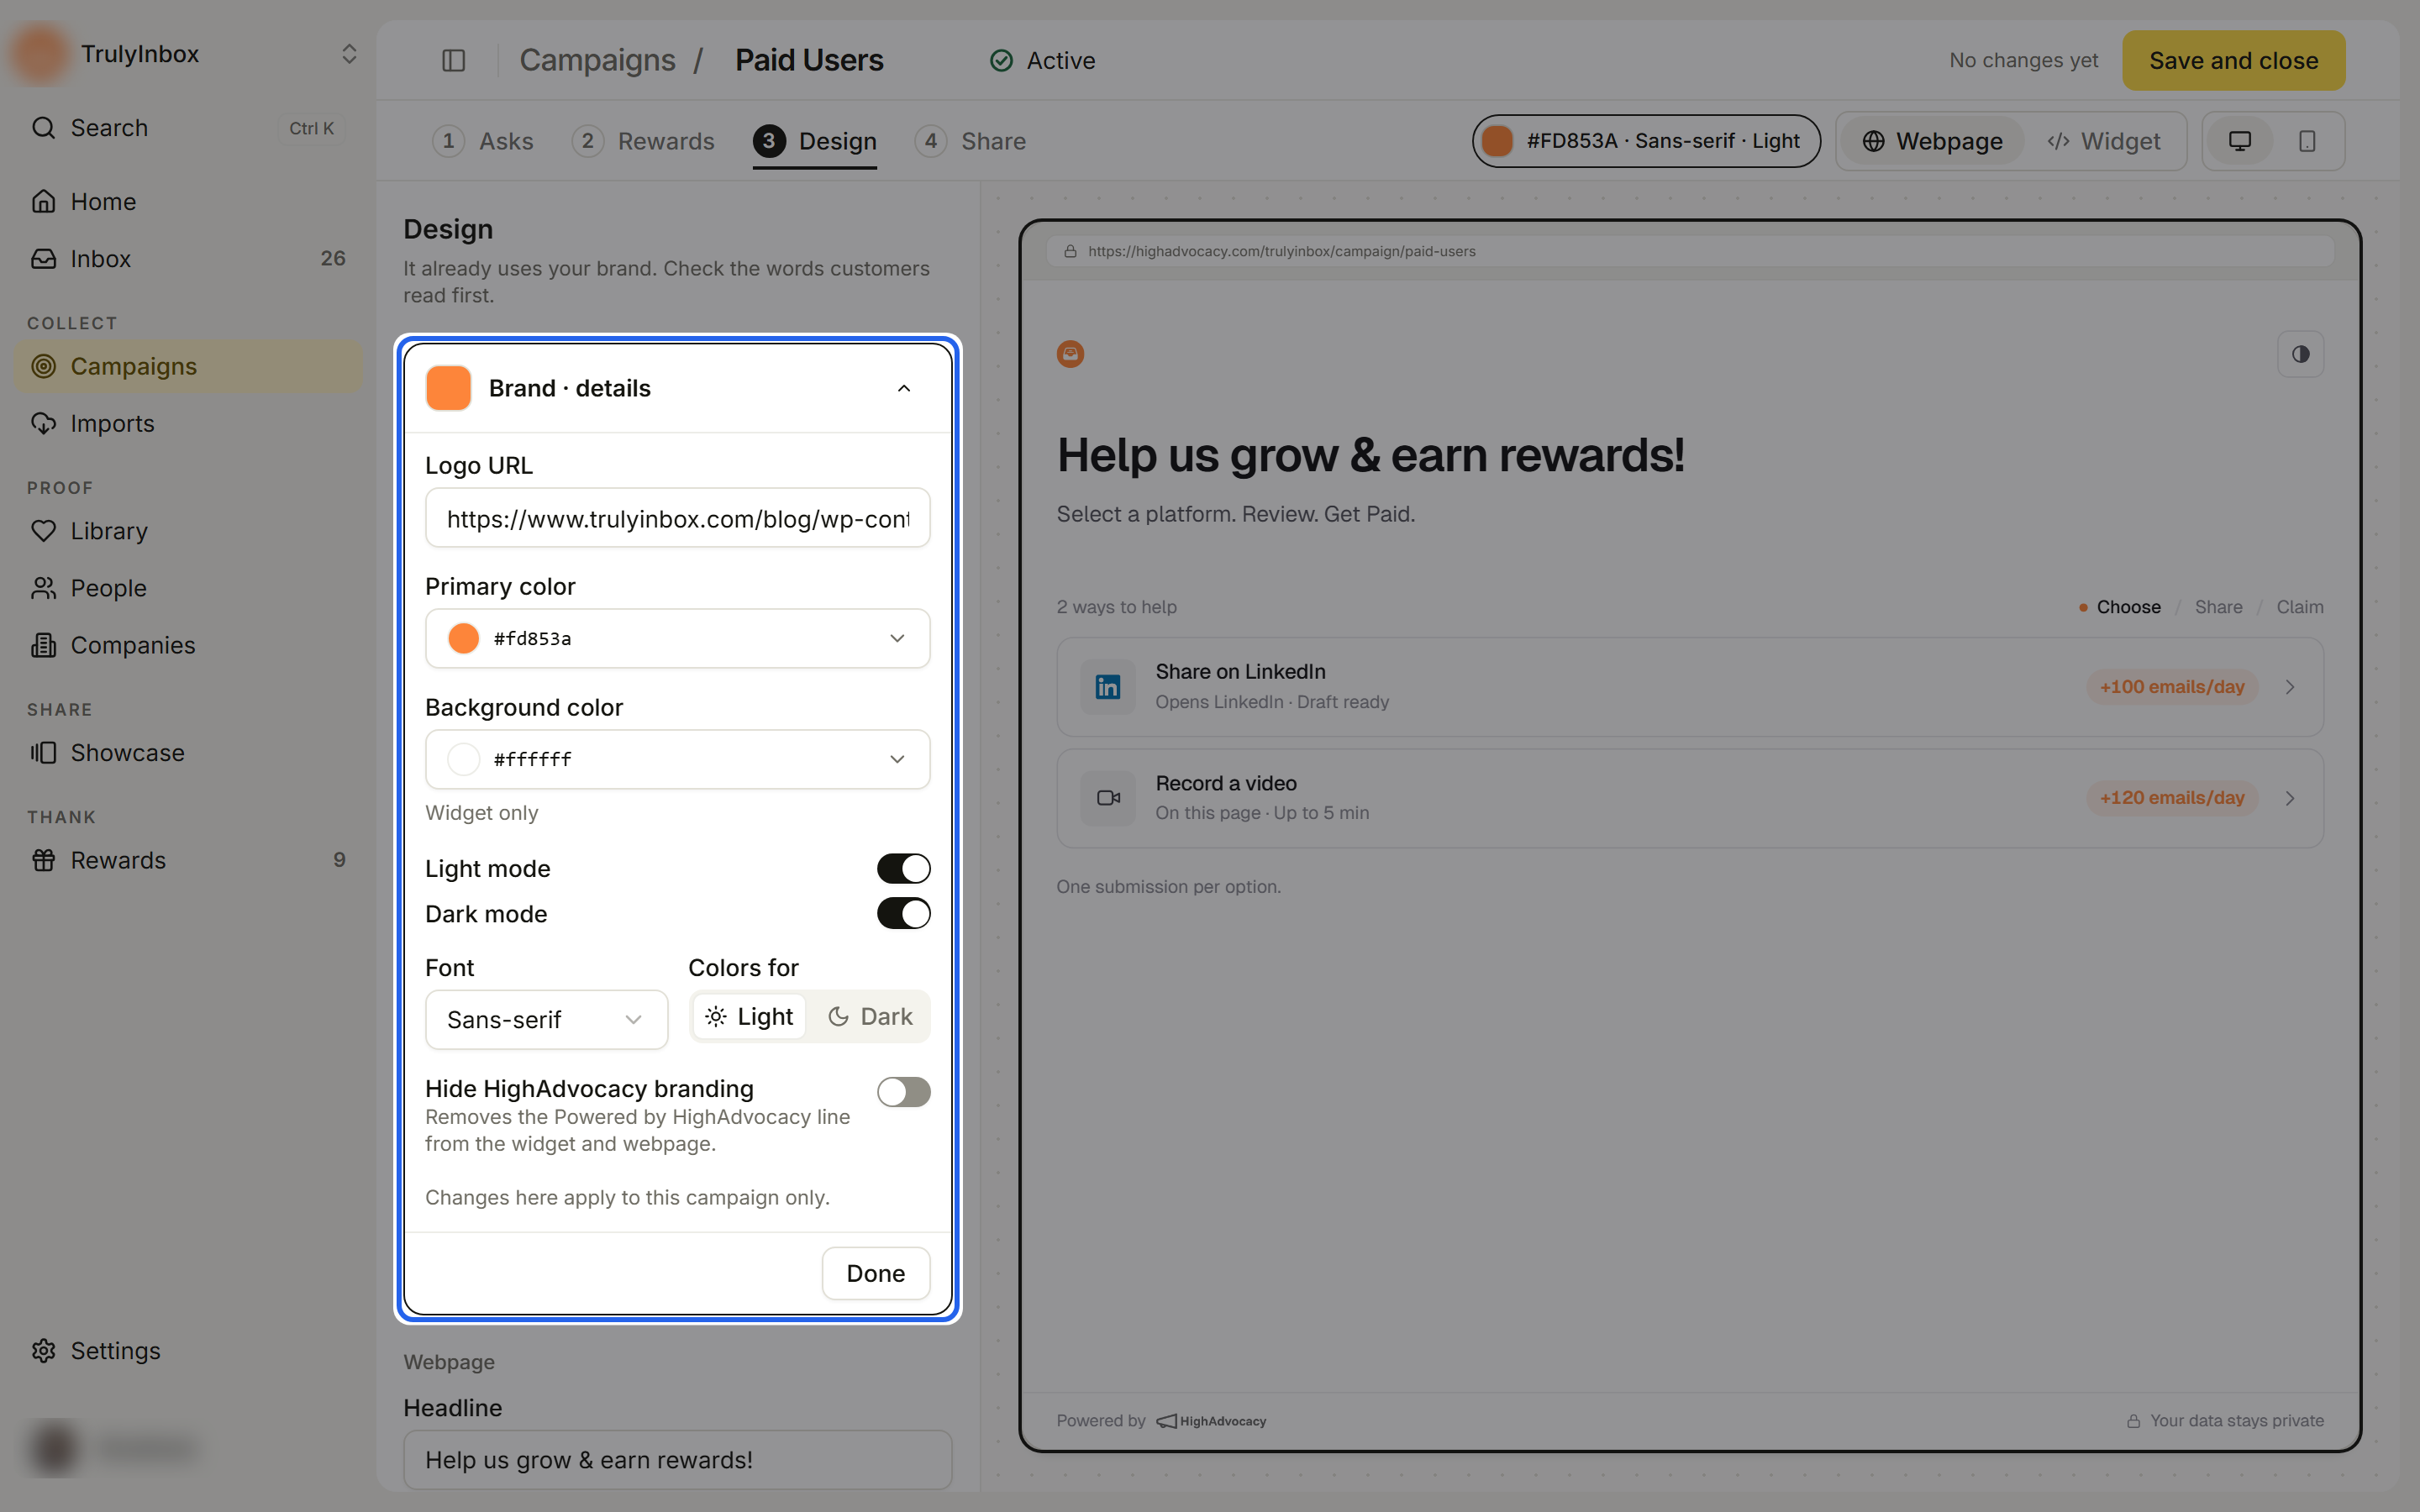
- Click the Brand row (or the color chip at the right end of the tab bar). Brand · details opens.
- Set the fields you need:
- Logo URL: a link to your logo image, for example
https://yourcompany.com/logo.png. It shows at the top of the hosted page. - Primary color: the accent for buttons, reward pills and highlights.
- Background color: the widget background. It is marked Widget only and does not change the hosted page.
- Light mode and Dark mode: turn on one or both. You must keep at least one mode on.
- Font: Sans-serif, Serif or Monospace.
- Colors for: shown when both modes are on. Pick Light or Dark, then set the colors for that mode.
- Hide HighAdvocacy branding: removes the “Powered by HighAdvocacy” line from the widget and the webpage.
- Logo URL: a link to your logo image, for example
- Click Done.
When both light and dark mode are on, customers see a theme button at the top of the hosted page and can switch between the two. With only one mode on, the page always uses that mode. For the widget, set darkMode in the install code (see Share your campaign).
Write the headline and subtext
The webpage and the widget each have their own copy:
- Webpage → Headline and Subtext: the top of your hosted page.
- Widget → Headline and Subtext: the top of the widget.
You can type in the fields, or click the headline or subtext on the preview and type straight on the page.
Both fields are required for every channel that is on. If one is empty, the builder shows “Add a headline. It’s the first thing customers read.” or “Add subtext. Customers read it under the headline.”, and Go live or Save and close lists it as a thing to fix (for example “The webpage headline is empty”).
If a channel is off, its copy is kept for when you turn it back on in the Share tab.
Choose a layout
Under Widget → Layout, pick Cards or List. The webpage uses the same layout, so customers see the options in the same arrangement on both channels.
Before you go live
Until a campaign is live, the Design tab also shows a Before you go live block with the campaign’s checks: AI verification, Proof customers send and Reward approval. After launch these rows move to the Share tab under Campaign settings. See Set up AI verification for what each one does.
On a draft, Go live sits at the bottom of the Design tab. See Create a campaign.
Changing the design of a live campaign
On a live campaign, design changes count as unsaved until you click Save and close. Customers keep seeing the last saved version until then. See Manage campaigns.